2GIG GCTouch Panel Guide
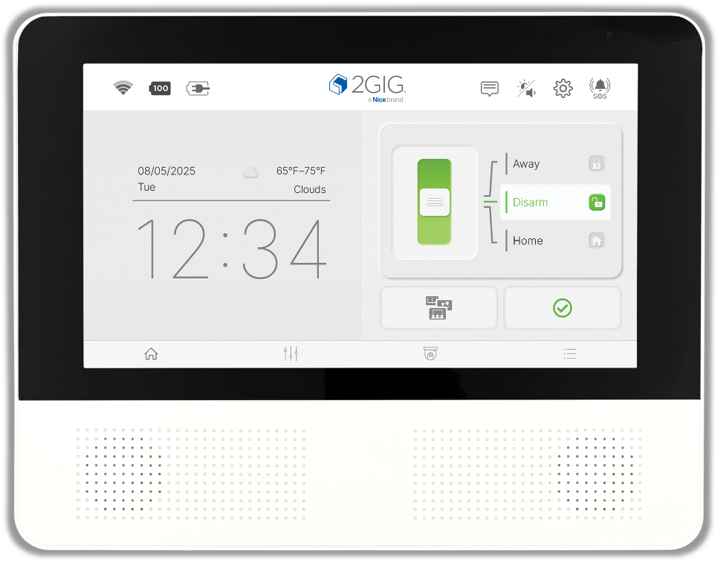
This guide covers everything you need to know about the 2GIG GCTouch, including specifications, user functions, and troubleshooting.
Navigate to the section you're looking for using the links below:
Specifications
- Screen: 7" capacitive touchscreen
- Operating temperature 32°F to 104°F (0°C to 40°C) Max humidity 90%
- 100-240VAC 50/60Hz 1.7A 14VDC adapter Lithium-polymer backup battery (24 hrs.)
- Dimensions: 7.5 L x 6.0 W x 1.25 D (in) 19.05 L x 15.24 W x 3.175 D (cm)
- Weight: 1.39 lbs | 0.63 kg
Features
- Bluetooth disarm
- 128 Zones
- 64 Users
- Z-Wave 800 series
- Video live view to the panel
- 345S, 345MHz, and eSeries encrypted sensors
User Functions
This section provides walkthroughs for the basic user functions of the 2GIG GCTouch panel.
Check Your System Status
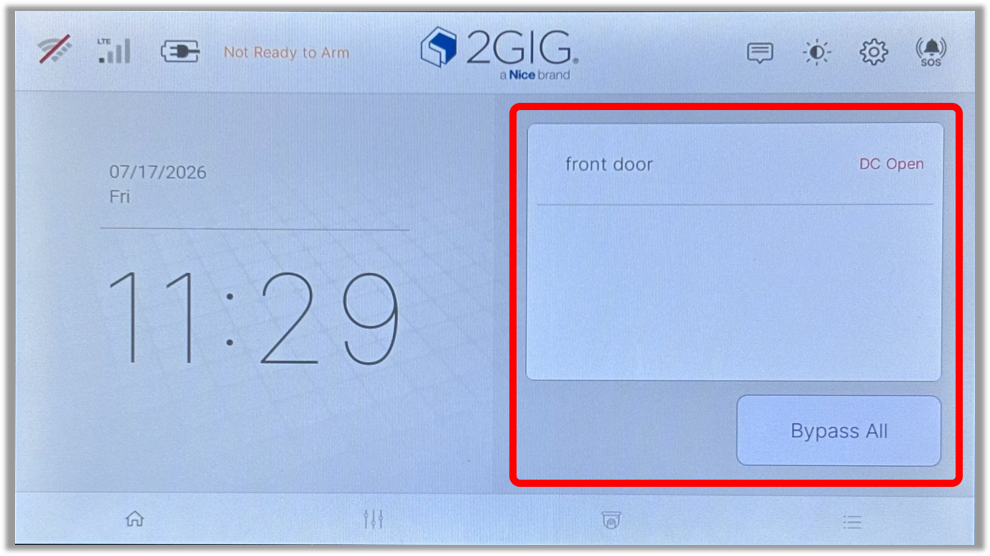
Checking your system's status will display which sensors are currently open or if any of your sensors are experiencing a trouble condition, such as a low battery.
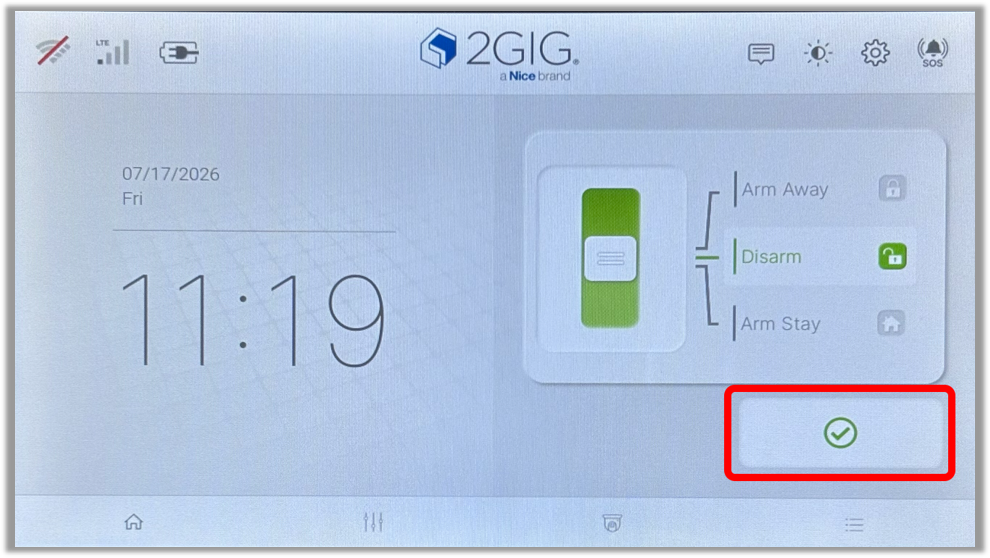
- A green check mark displayed on the home screen indicates there are no errors or issue, and the panel is ready to arm.
- If there are any sensor issues that would prevent the system from being armed, it will be displayed in place of the arming options.
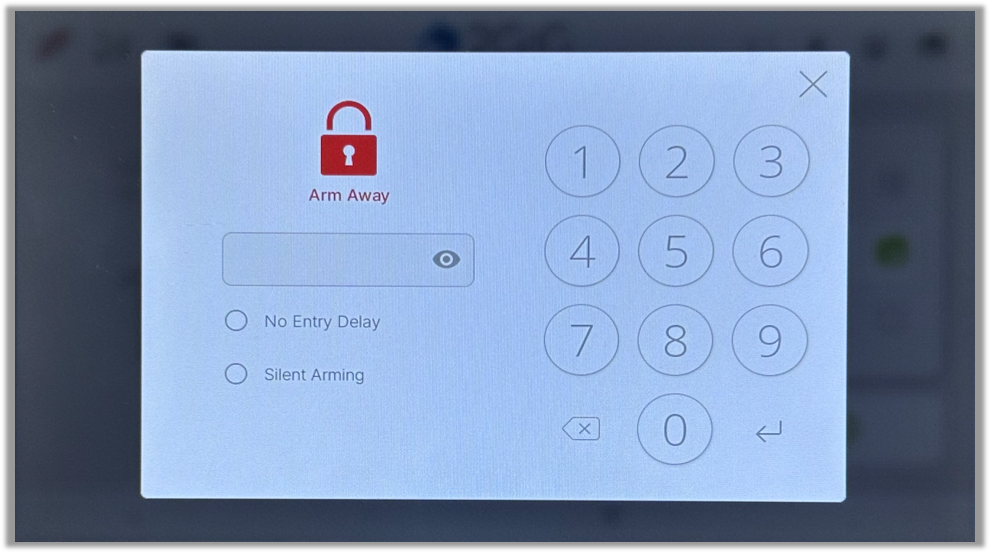
Arm Away
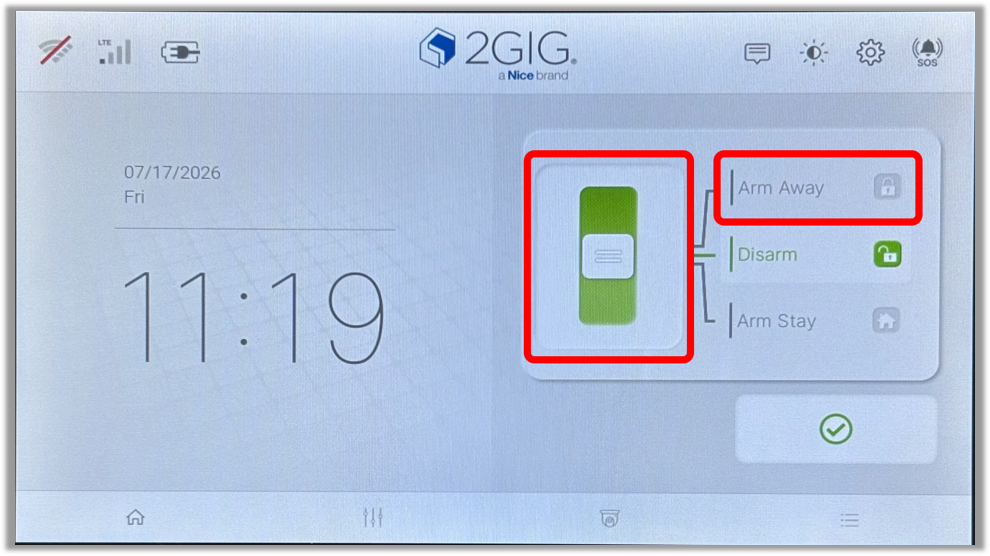
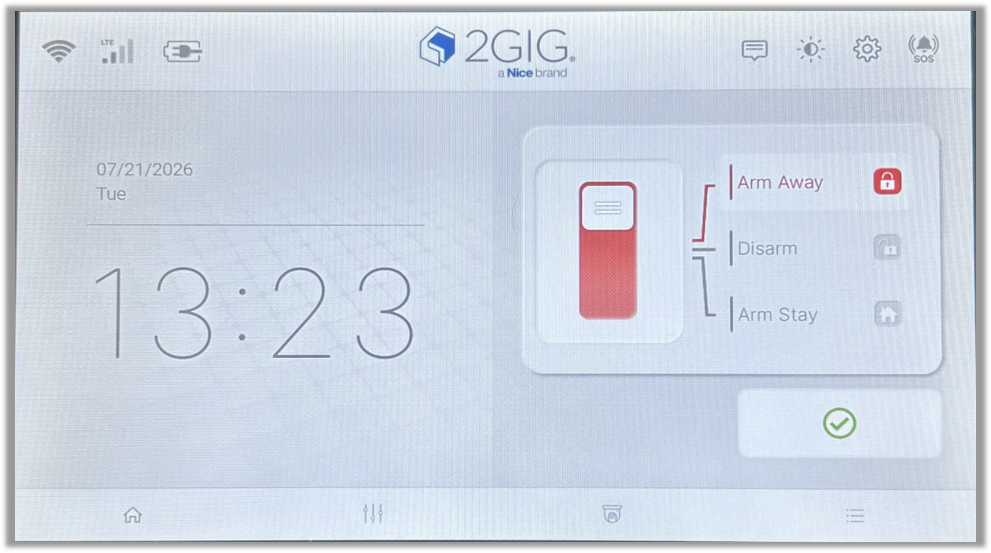
Arm away is used when you plan on arming the system and leaving the home.
- Slide the arming slider up or tap Arm Away.
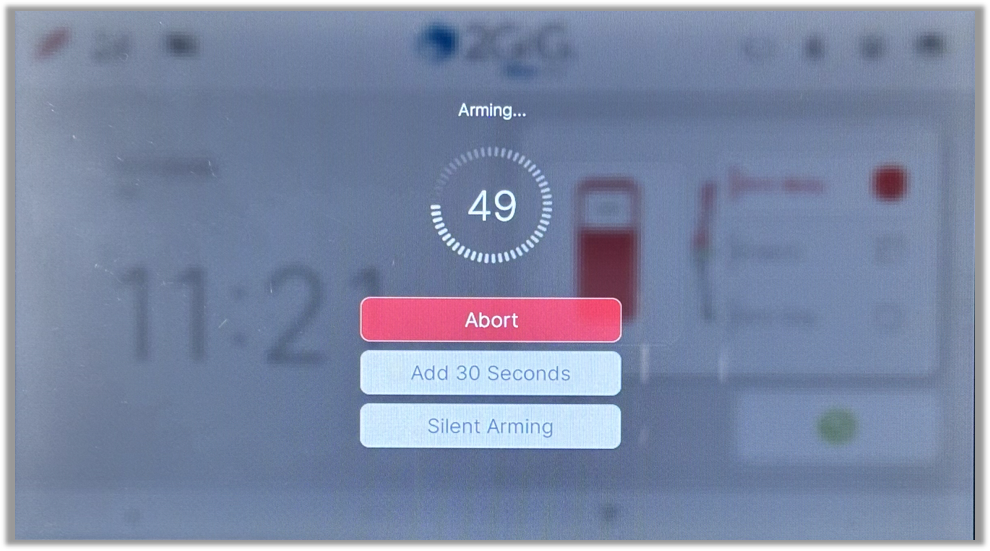
- No Entry Delay or Silent Arming can be selected from here. Once arming options have been selected, enter your user code and tap the enter arrow.
- The system will then count down the arming cycle.
- Once the countdown is finished, the system will show that it is armed away.
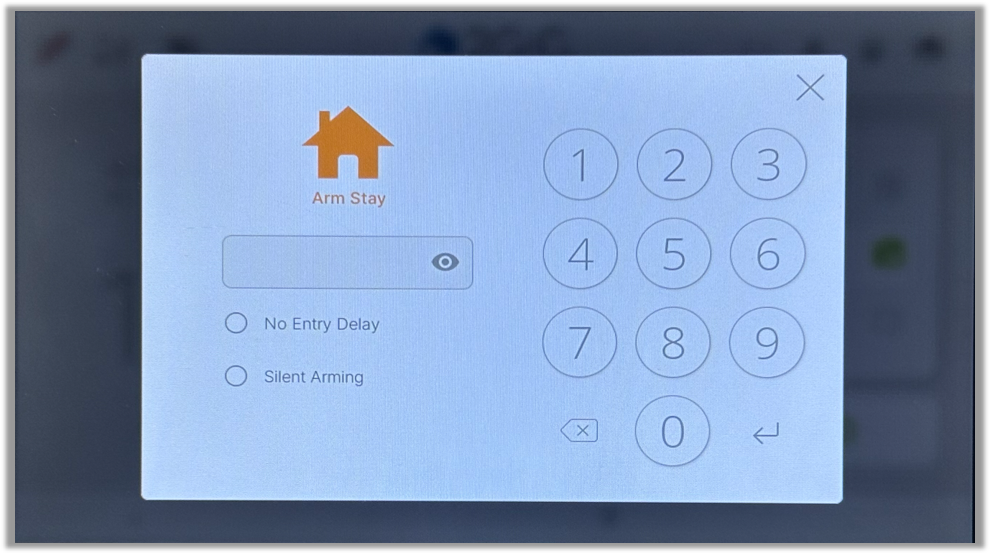
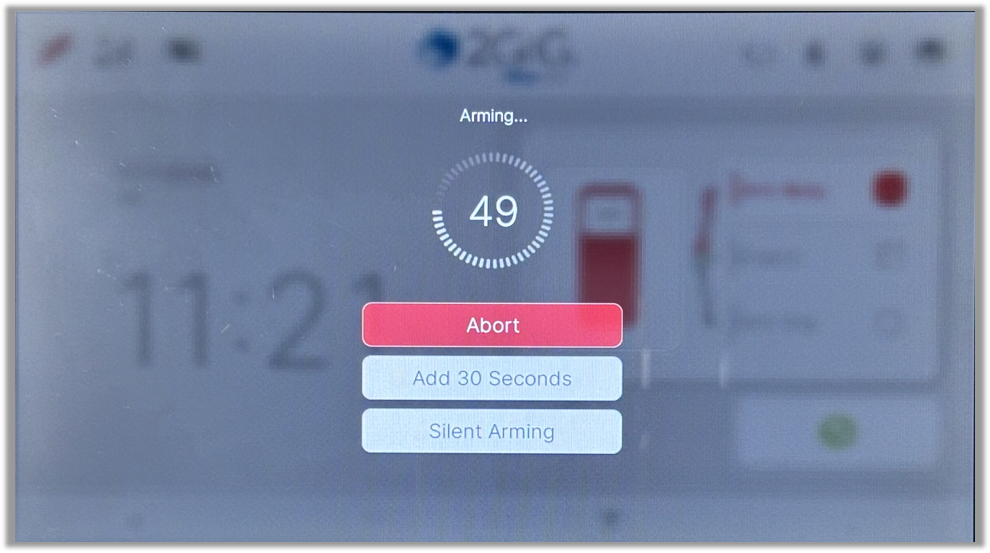
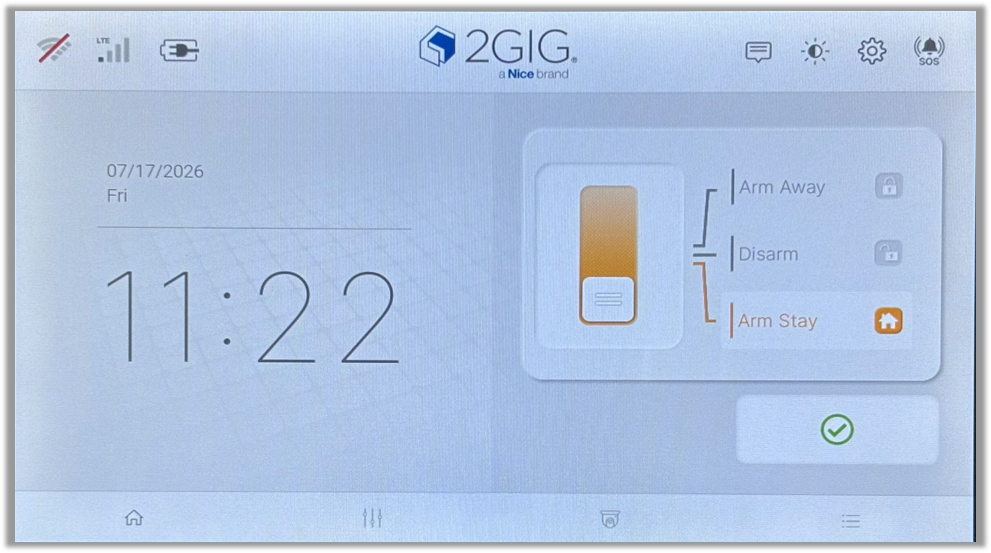
Arm Stay
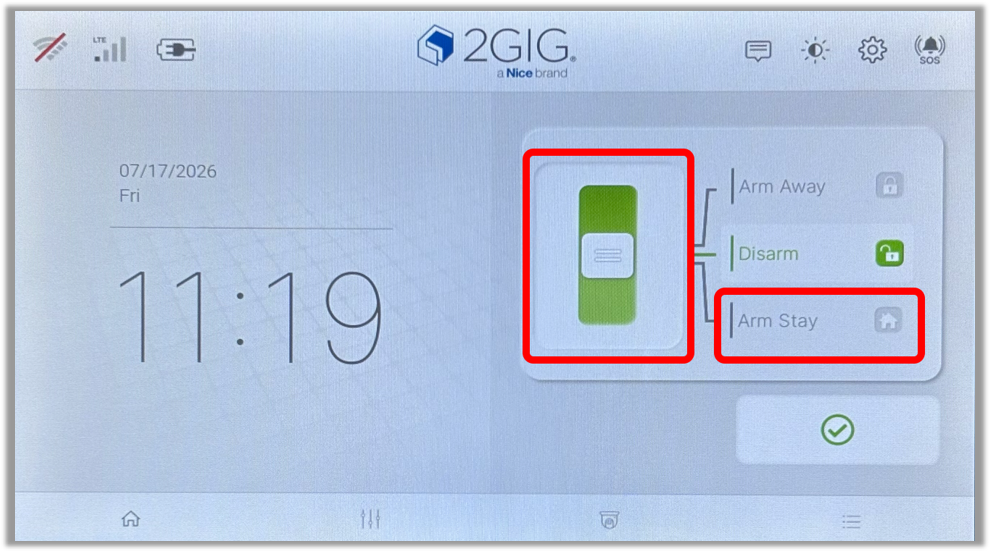
Arm stay is used when you plan on arming the system and staying home.
- Slide the arming slider down or tap Arm Stay
- No Entry Delay or Silent Arming can be selected from here. Once arming options have been selected, enter your user code and tap the enter arrow.
- The system will then count down the arming cycle.
- Once the countdown is finished, the system will show that it is armed stay.
Disarm System
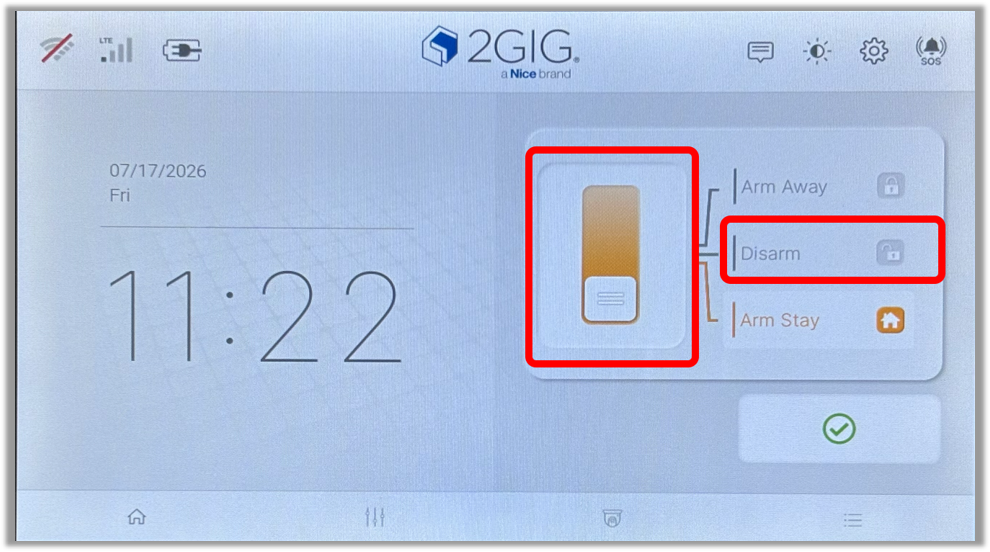
This will disarm your system, and it will silence and reset any active alarm.
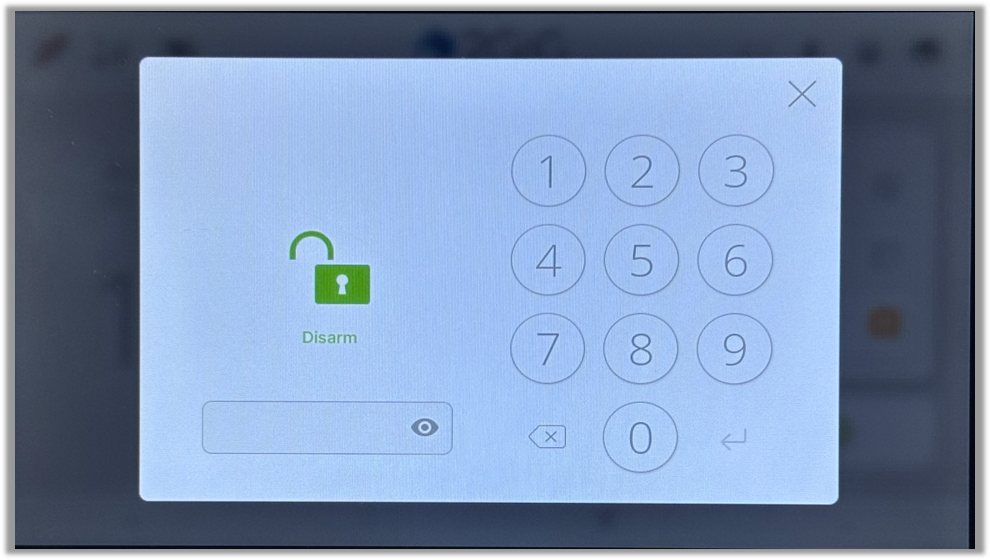
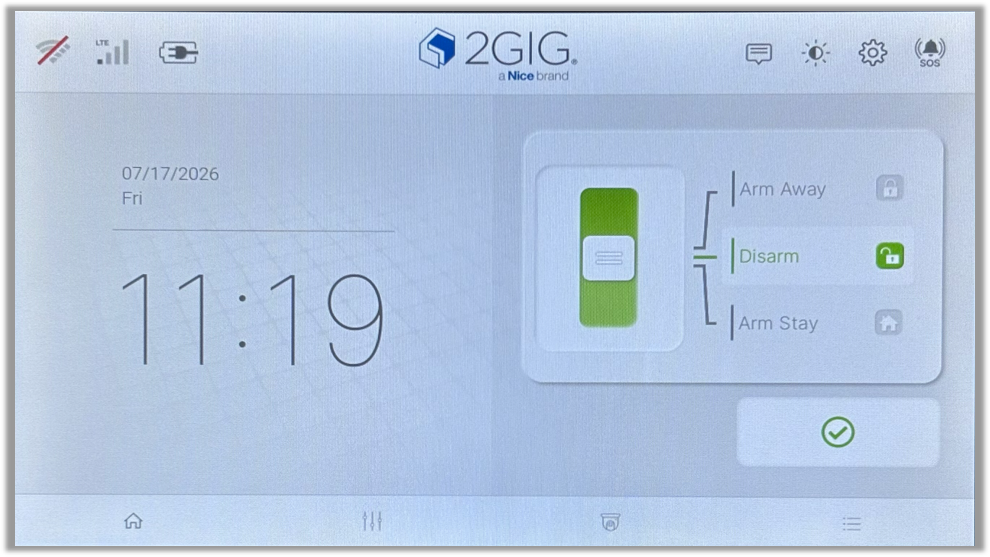
- Slide the arming slider to the middle or tap Disarm.
- Enter your user code, then tap the enter arrow.
- The system will then show disarmed.
Panic Buttons
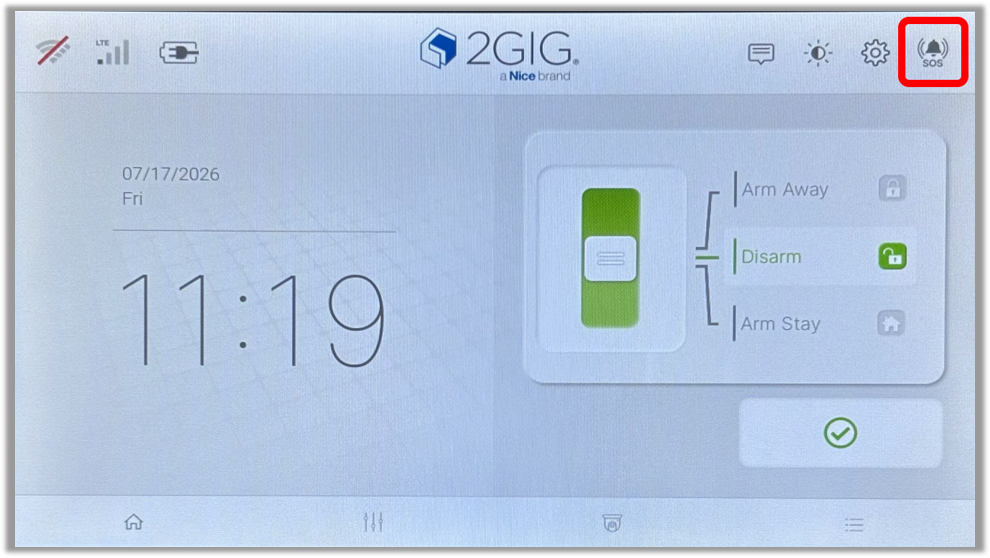
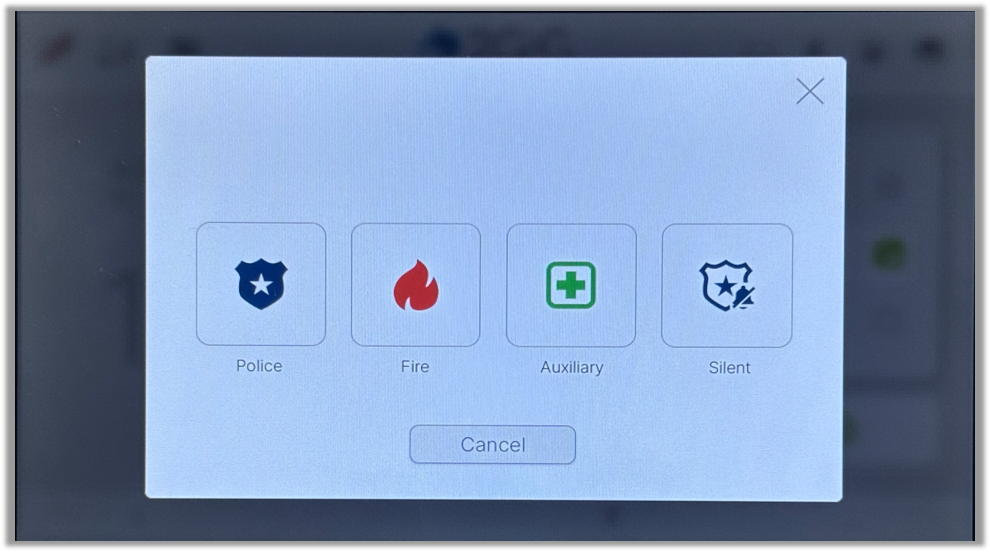
In case of an emergency, a police, fire, or medical panic can be triggered manually.
- Tap the SOS icon in the top right corner of the screen.
- Tap and hold the needed panic option until the siren begins to sound. The Silent option will not sound the siren, but instead return to the home screen.
Bypass
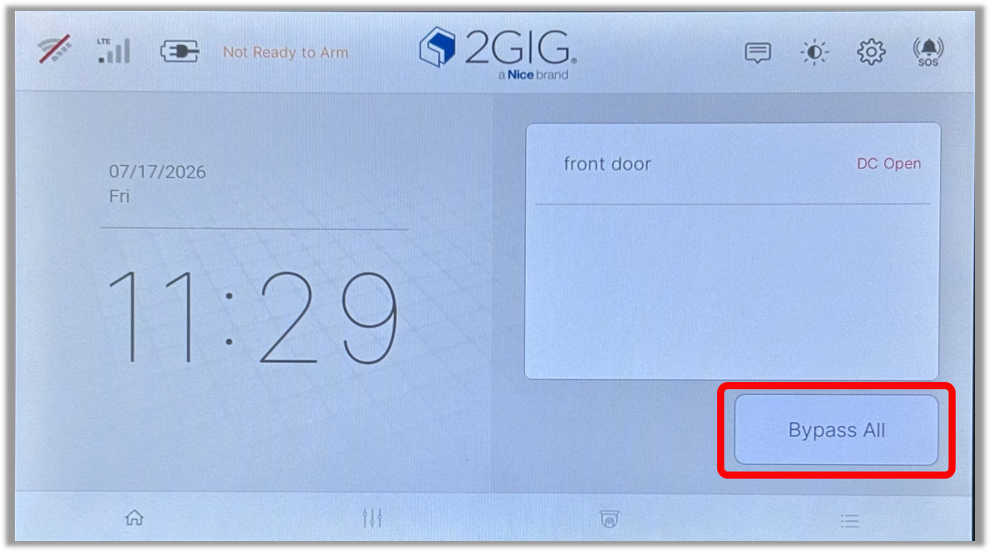
Sensors can be bypassed so the system will arm without monitoring the bypassed sensors.
- If any sensors are reporting an error that would prevent the system from arming, the Bypass All option can be selected from the home screen.
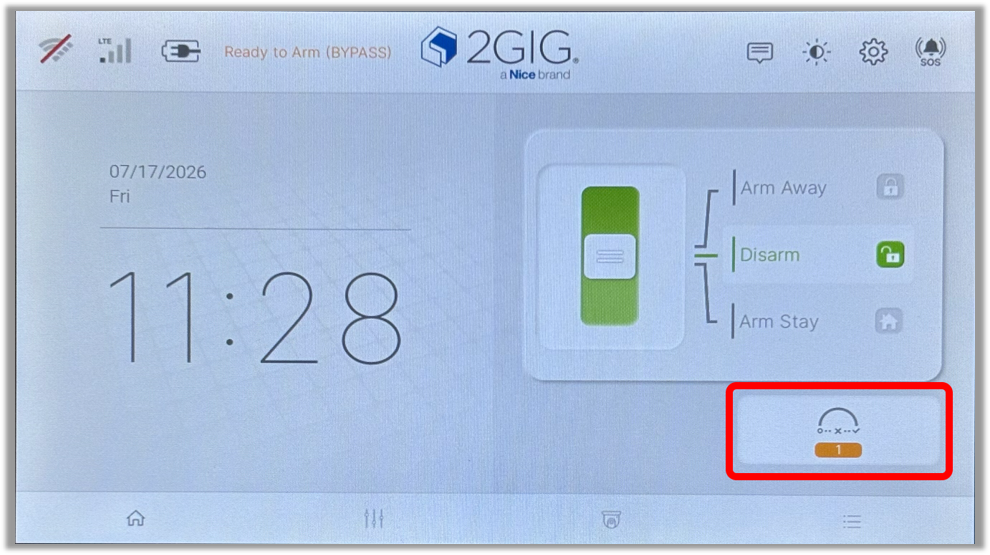
- The screen will then show the bypassed icon, and the system can be armed.
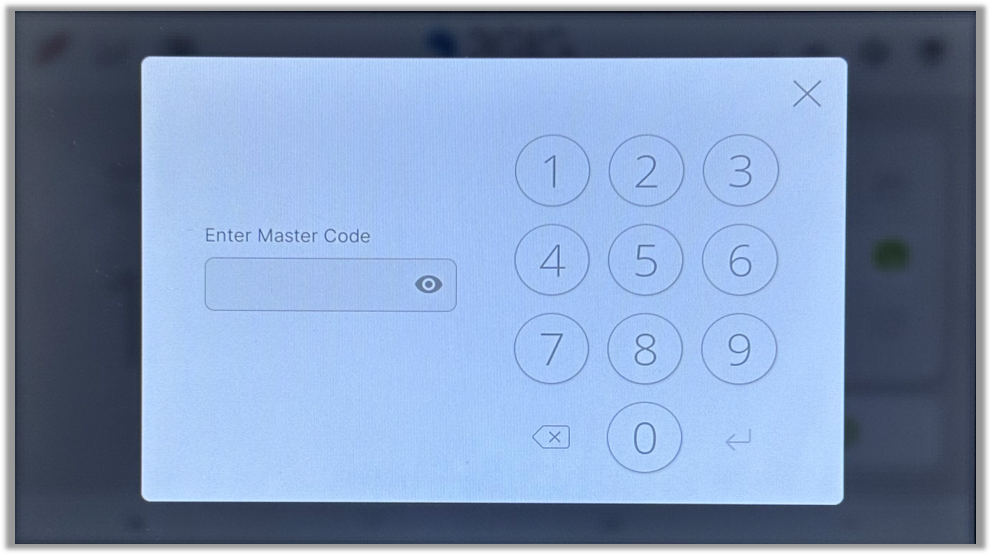
- Alternatively, you can tap the gear icon in the top right hand corner of the screen. Enter the master code, then tap the enter arrow.
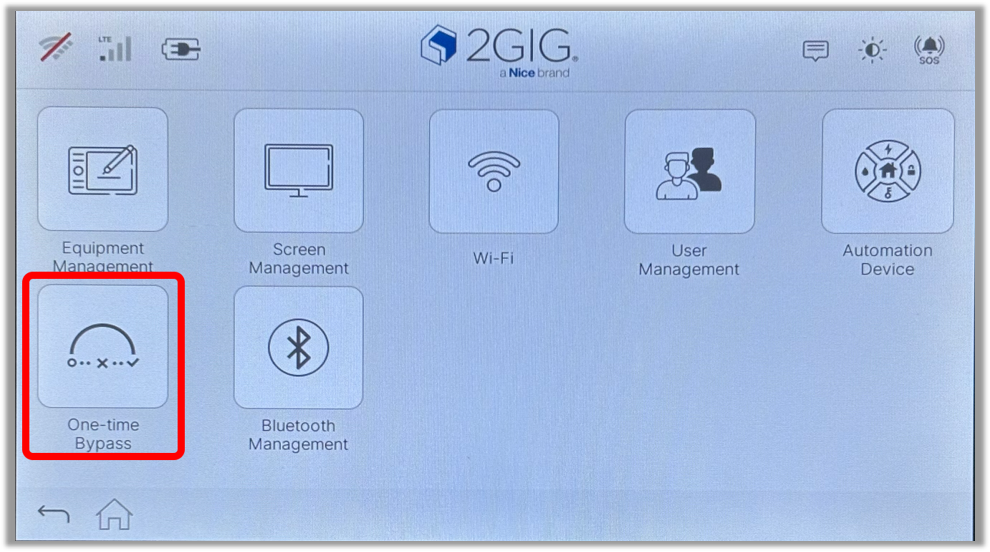
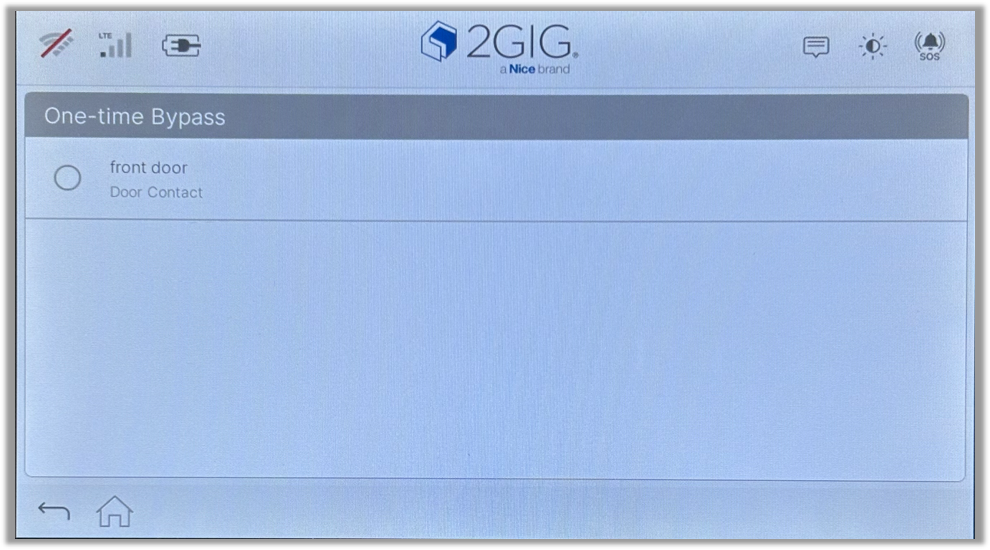
- Select One-time Bypass.
- Select the sensors you would like to bypass. After selecting, you may return to the home screen.
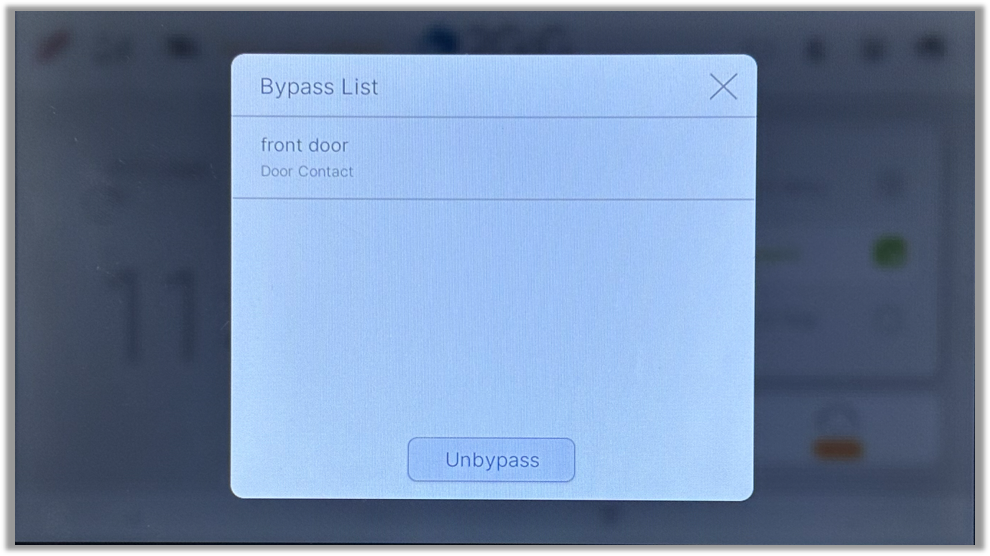
- To clear the bypass of a sensor, you can tap the bypass icon on the home screen.
- Tap Unbypass to clear the bypass on all sensors.

View History
A history of panel events can be viewed using this process.
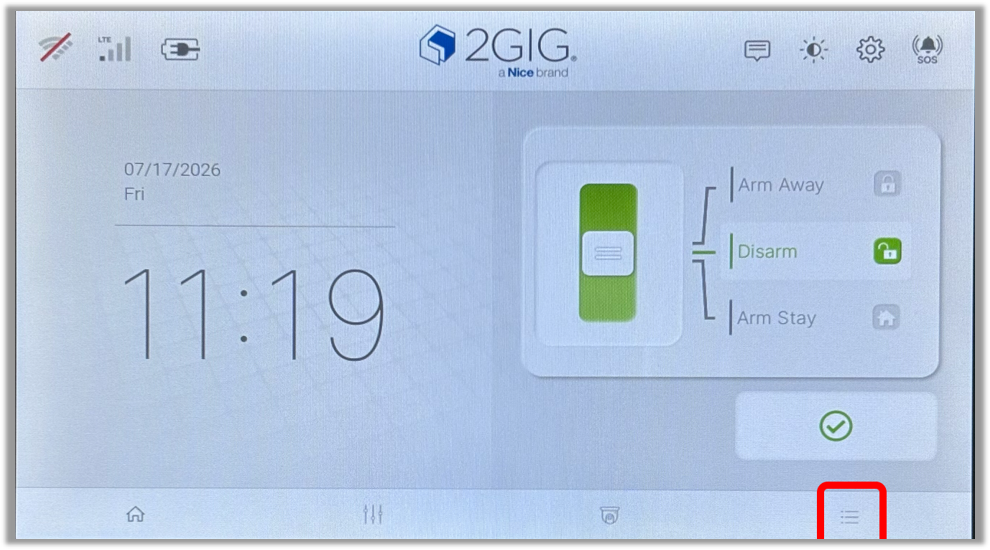
- From the home screen, tap the icon in the bottom right hand corner.
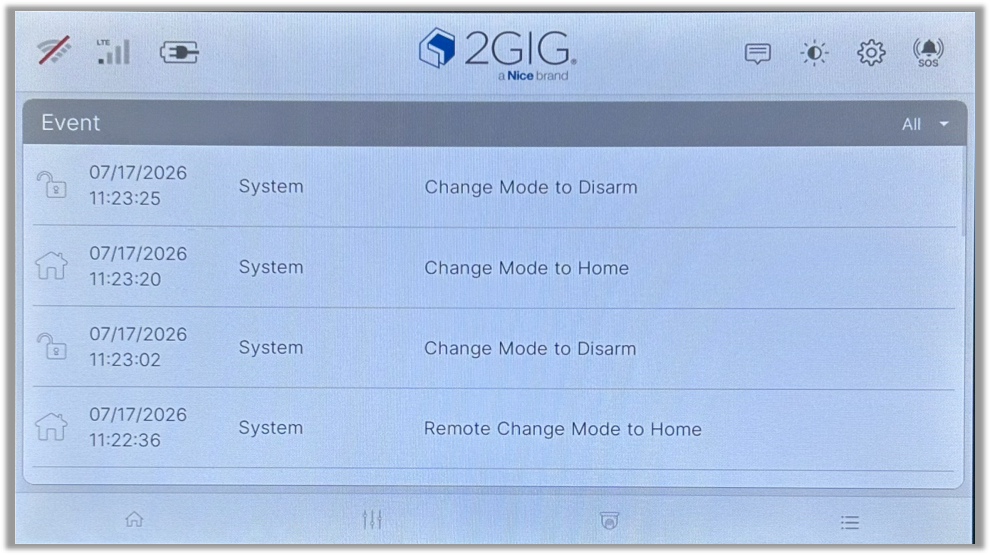
- Panel events will then be displayed in chronological order, with the most recent event at the top.
Acknowledge Alerts
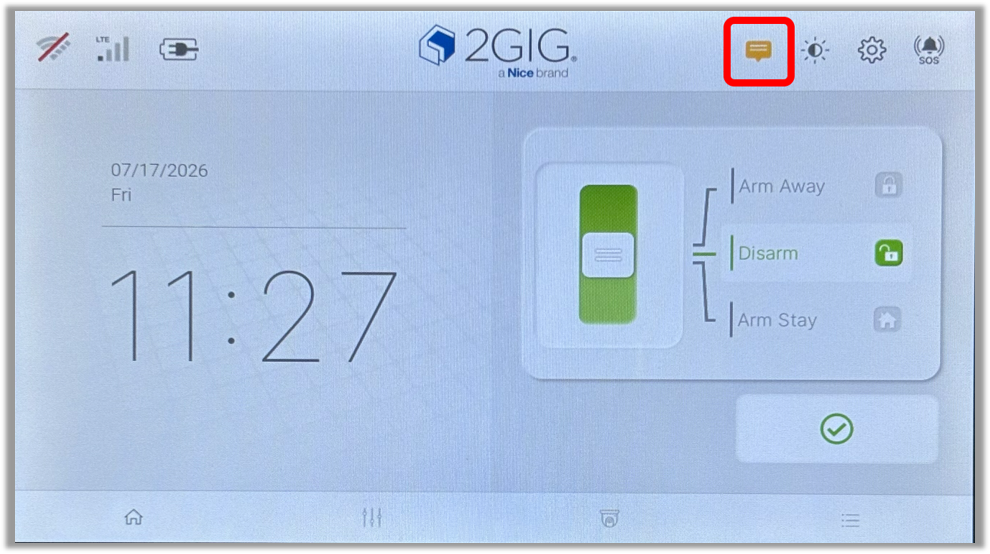
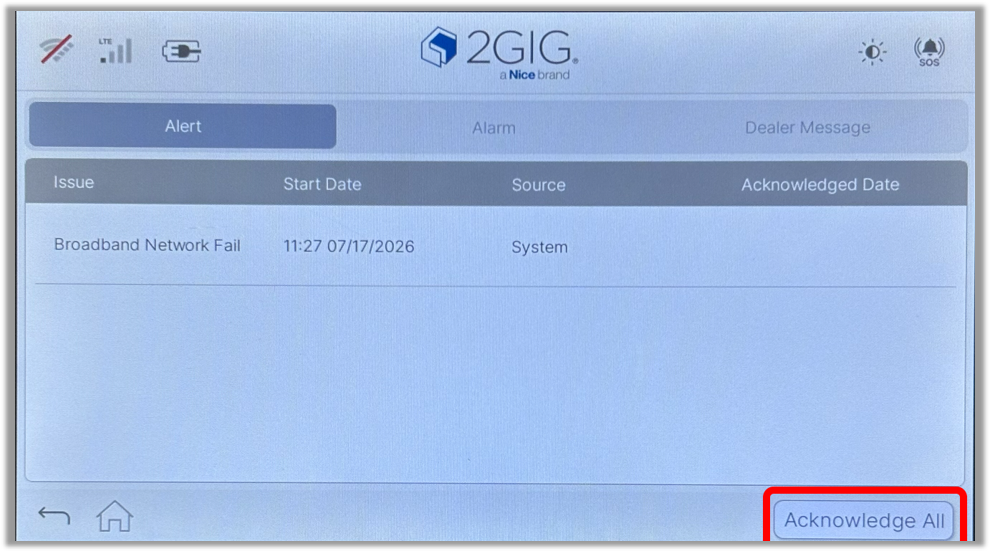
Alerts may cause the panel to beep. Use this process to acknowledge the alerts and silence the beeping.
- If there are any active alerts on the panel, the message icon at the top of the screen will flash yellow. To acknowledge the alerts, tap the message icon.
- Tap Acknowledge All.
Date & Time Settings
Change date and time settings for the panel.
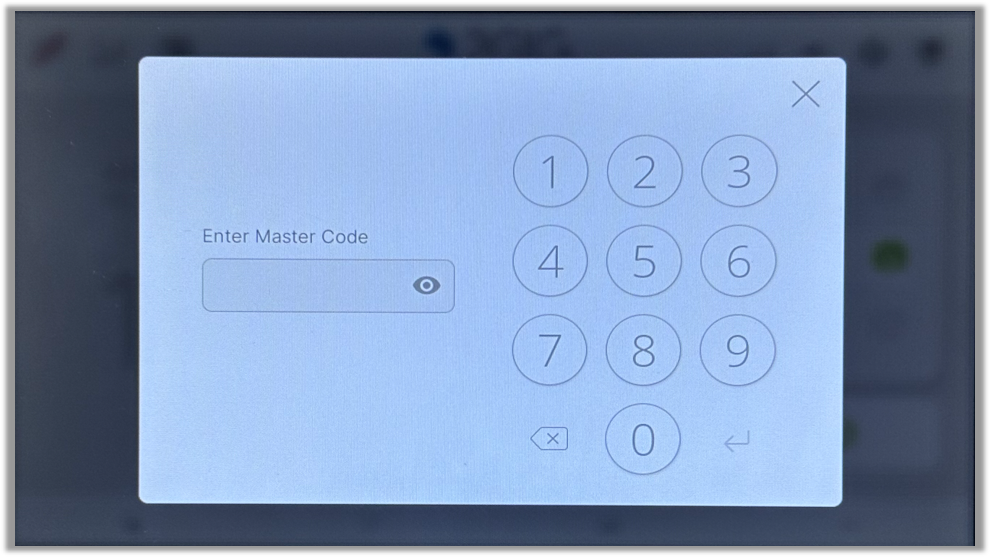
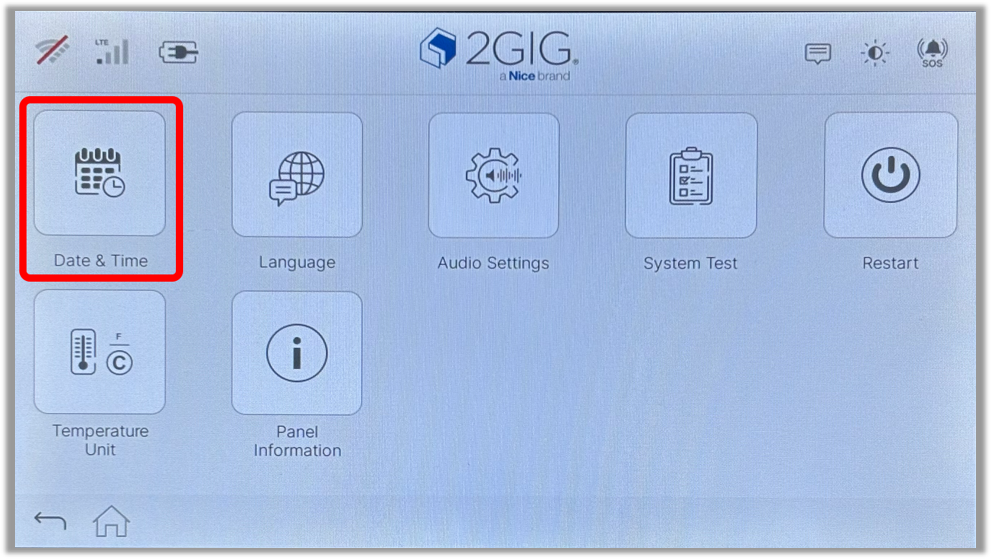
- The date and time will automatically be configured on the panel when it is connected to a cellular or Wi-Fi network. To adjust related settings, tap the gear icon in the top right hand corner. Enter the master code, then tap the enter arrow.
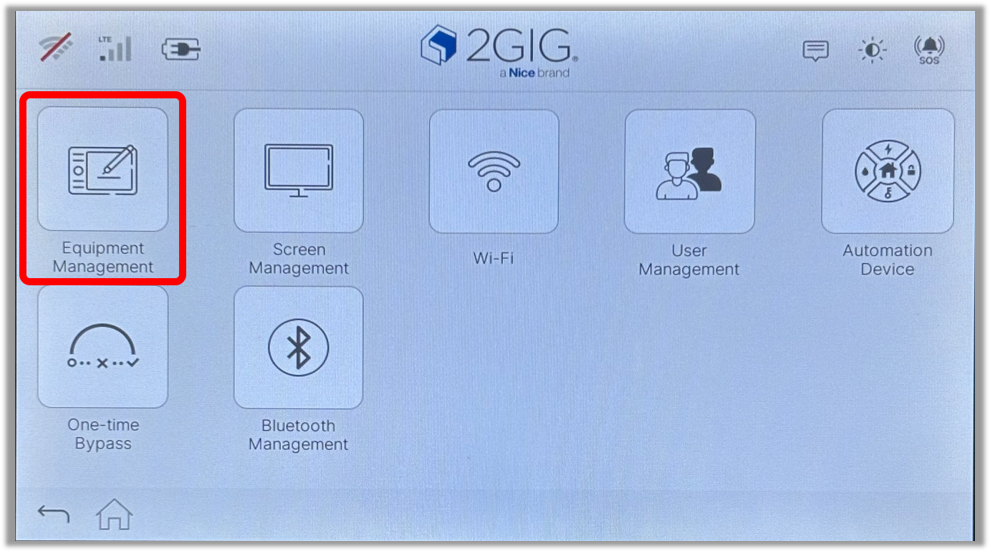
- Tap Equipment Management.
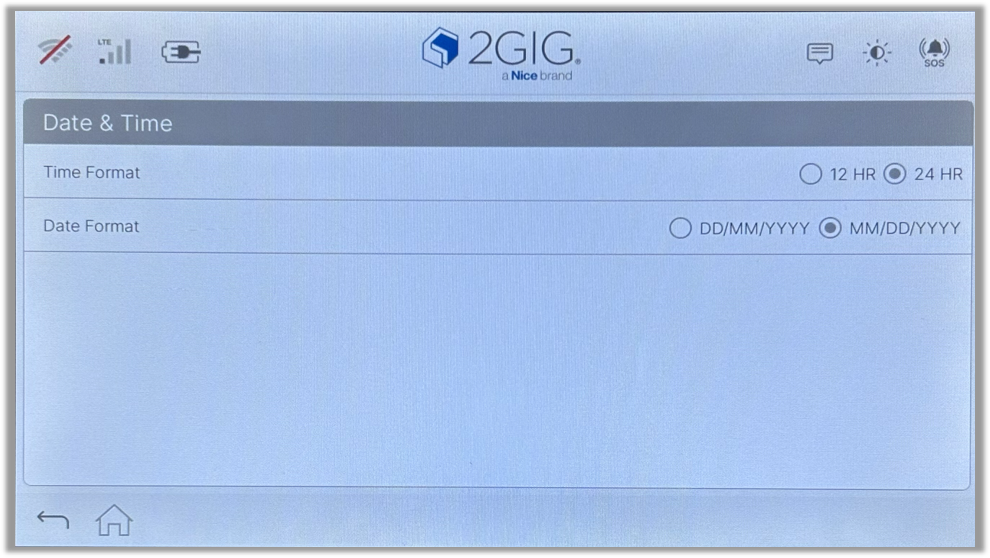
- Tap Date & Time.
- Adjust the desired settings, and return to the home screen once finished.

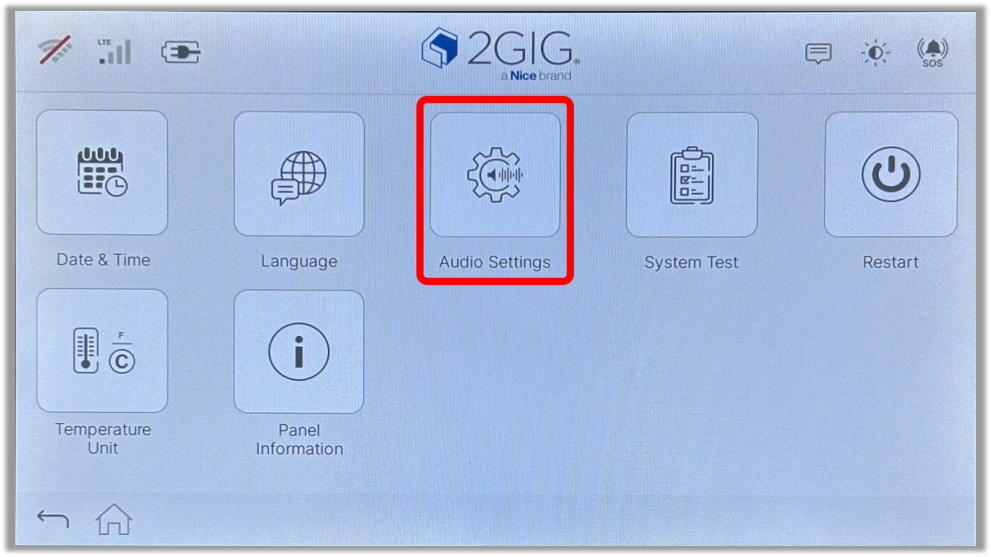
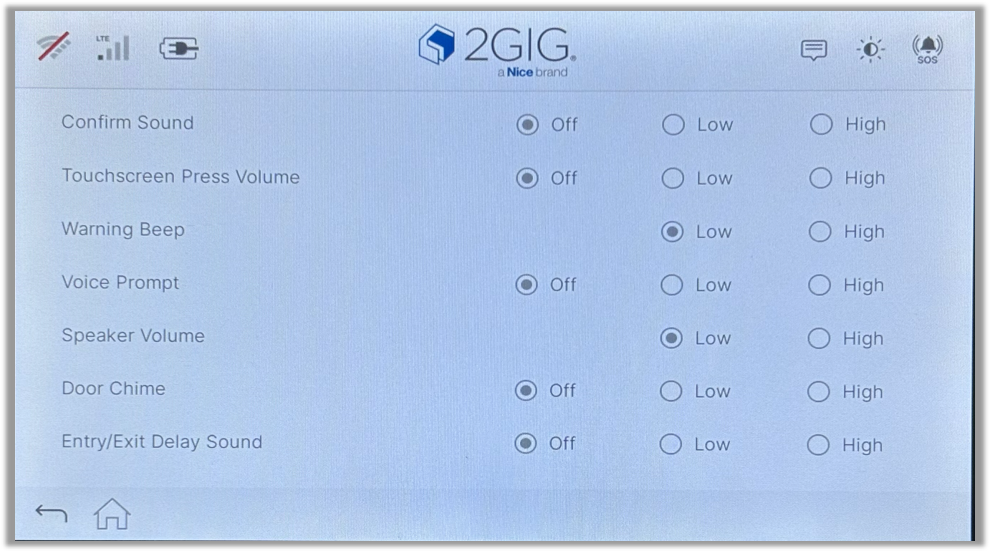
Sound & Volume Settings
Adjust different sound and volume settings for the panel.
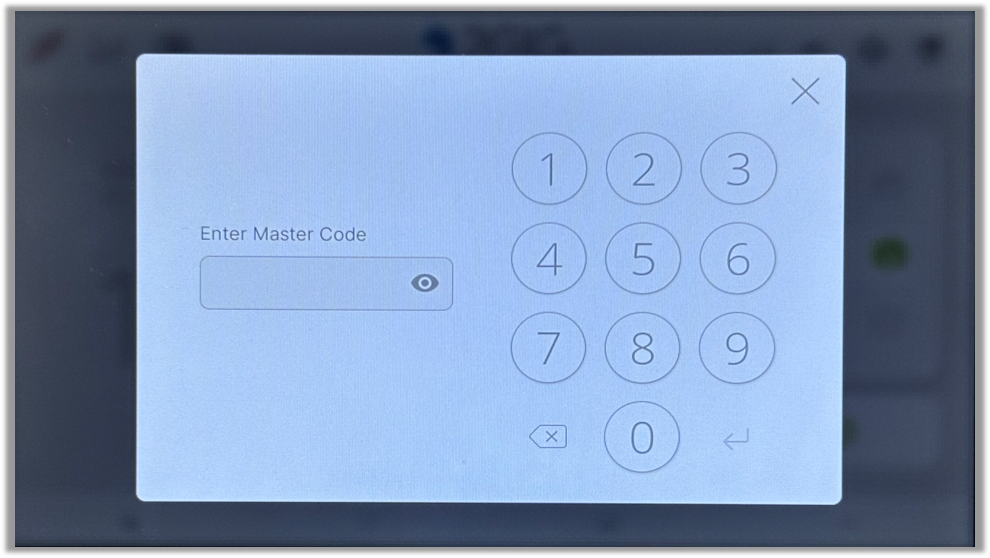
- Tap the gear icon in the top right corner. Enter the master code and tap the enter arrow.
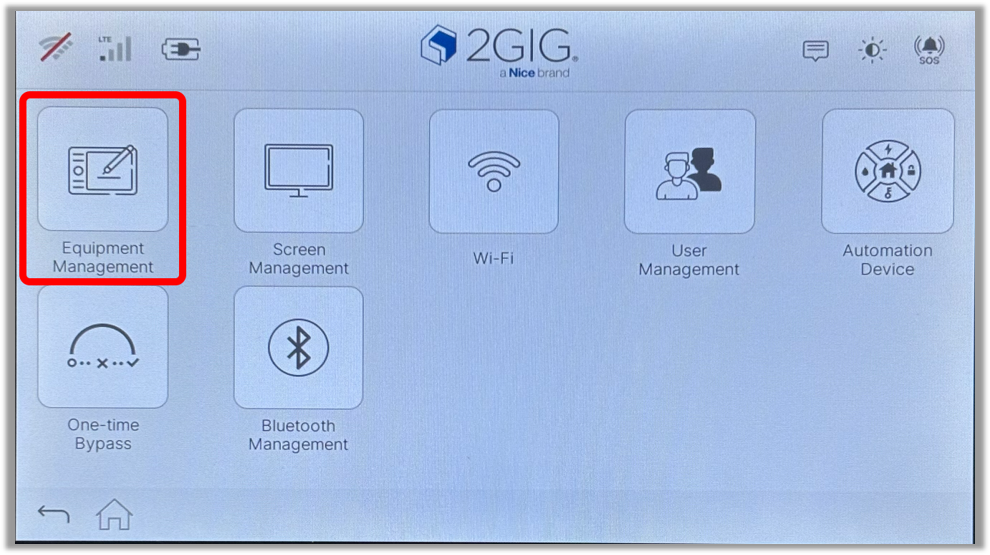
- Tap Equipment Management.
- Tap Audio Settings.
- Adjust the desired sound settings, then return to the home screen when finished.

Brightness
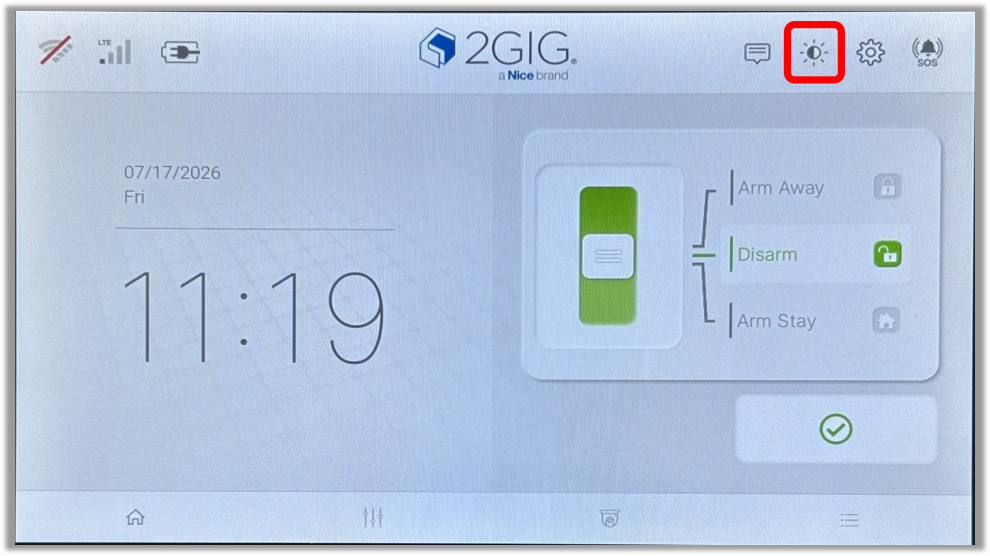
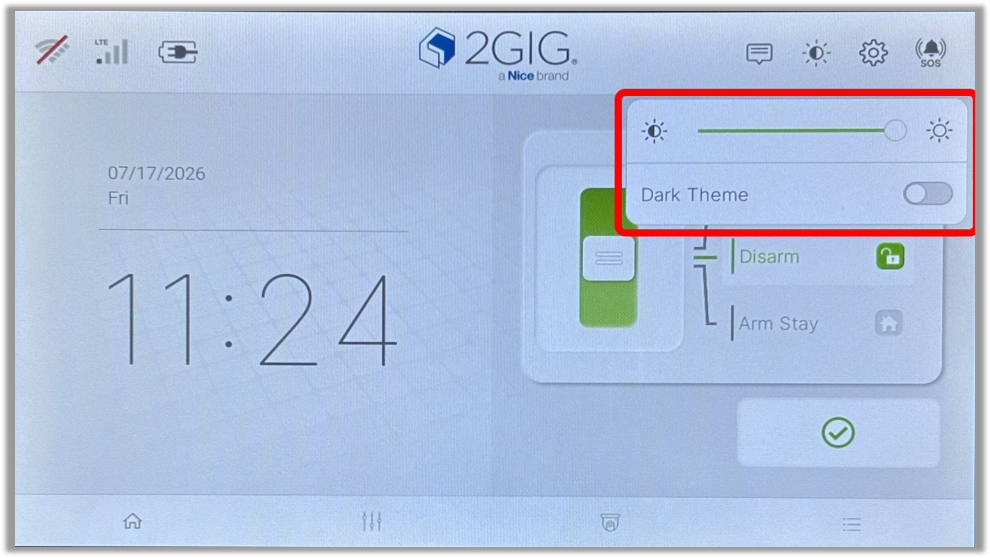
Adjust brightness and related settings.
- Tap the brightness icon in the top right corner.
- Slide the brightness slider up or down to the desired setting. You can also turn dark theme on and off from here.
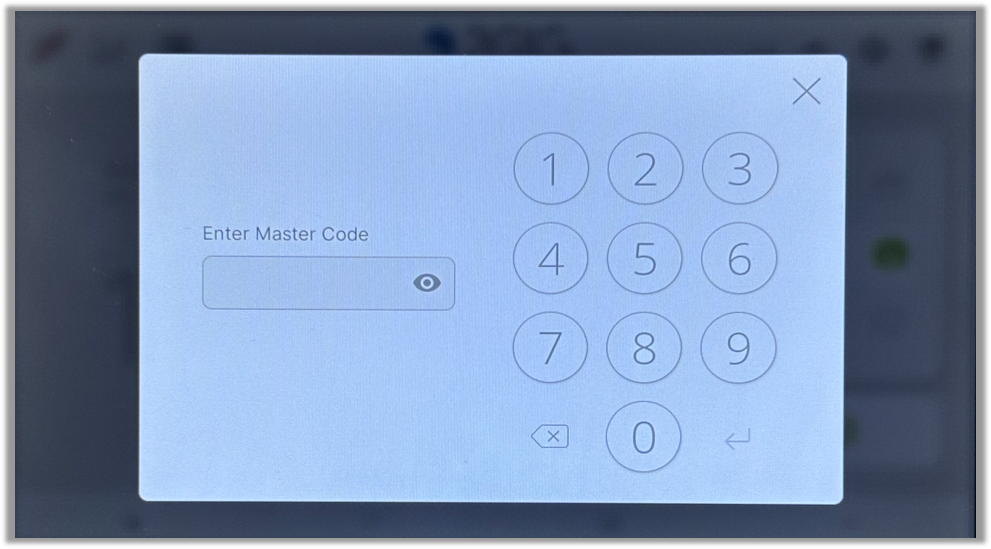
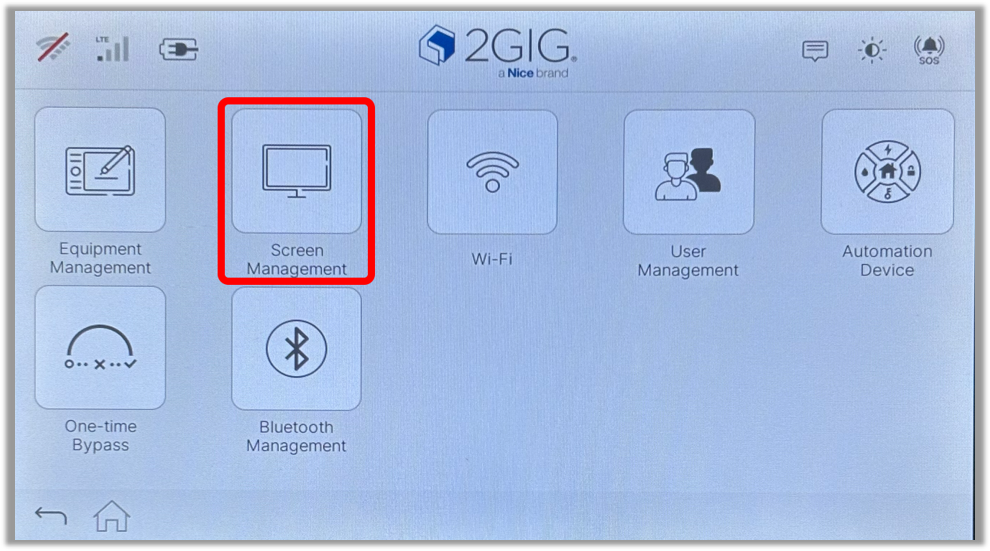
- For additional brightness settings, tap the gear icon in the top right corner. Enter the master code and tap the enter arrow.
- Tap Screen Management.
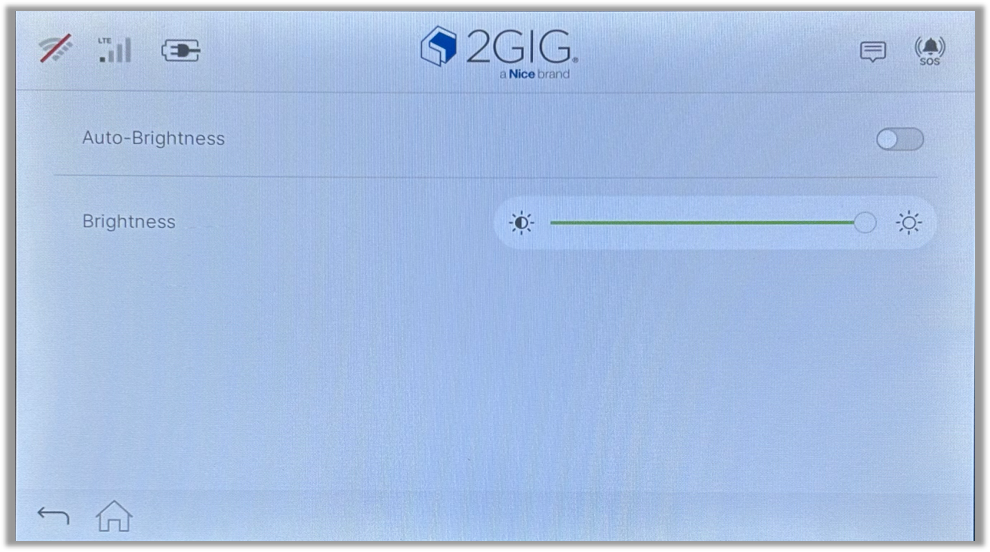
- Tap Brightness. Auto Brightness can be toggled here, as well as the brightness slider.
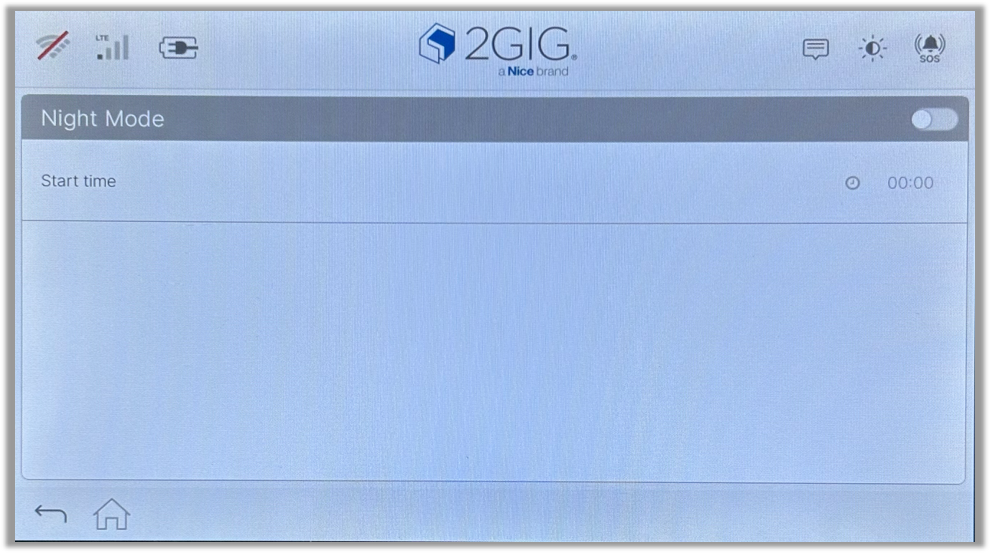
- Under Night Mode, night mode can be turned on or off, and a start time can be selected to automatically start night mode at a given time.



System Tests
Perform a variety of system tests.
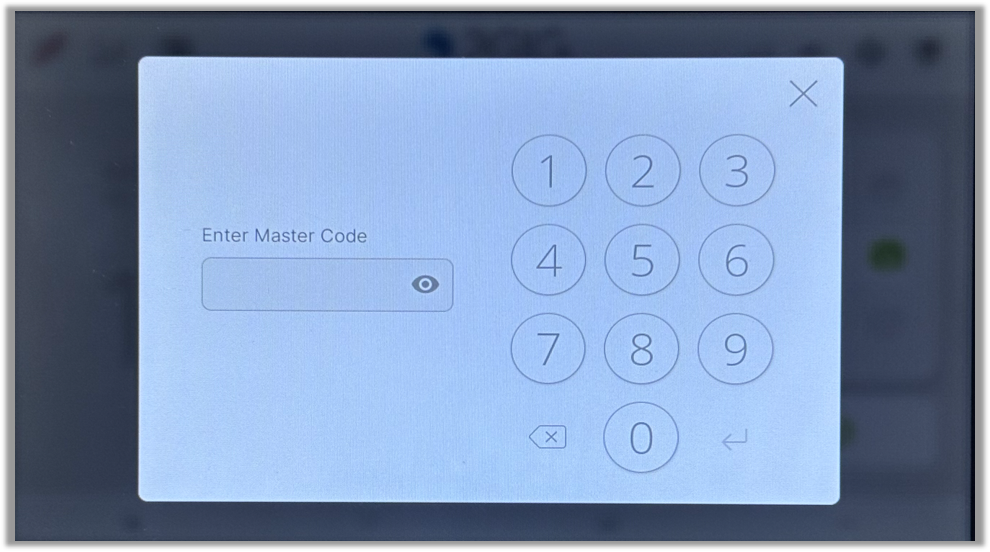
- Tap the gear icon in the top right corner of the screen. Enter the master code then tap the enter arrow.
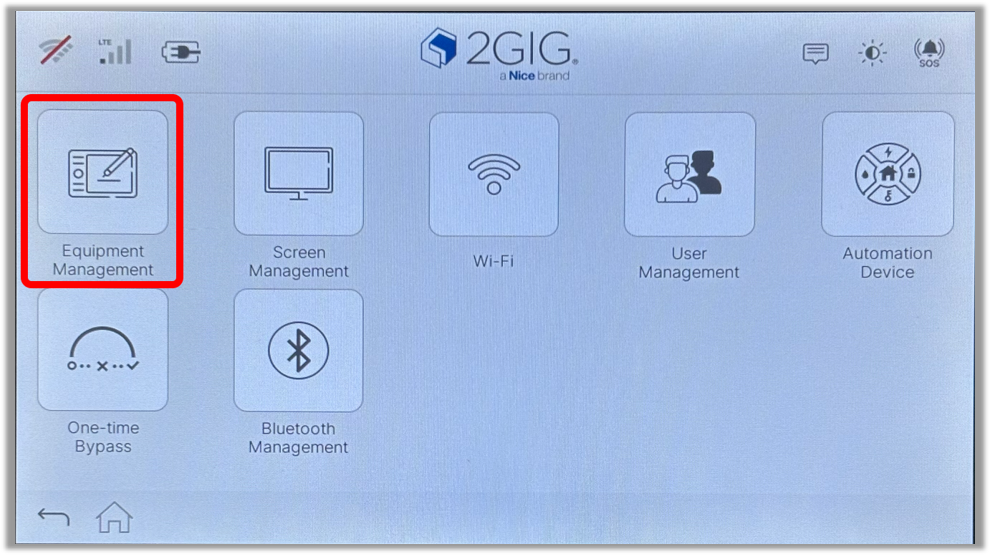
- Tap Equipment Management.
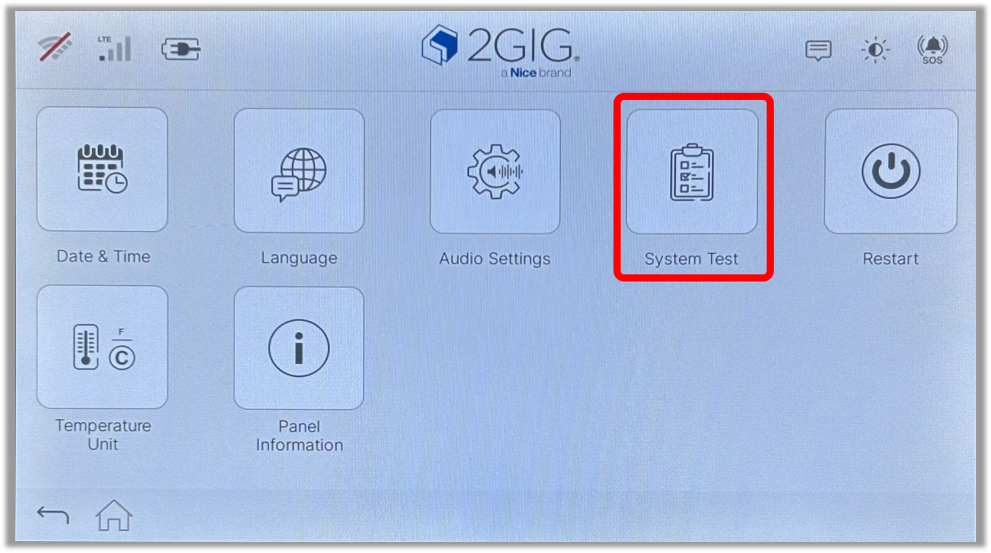
- Tap System Test.
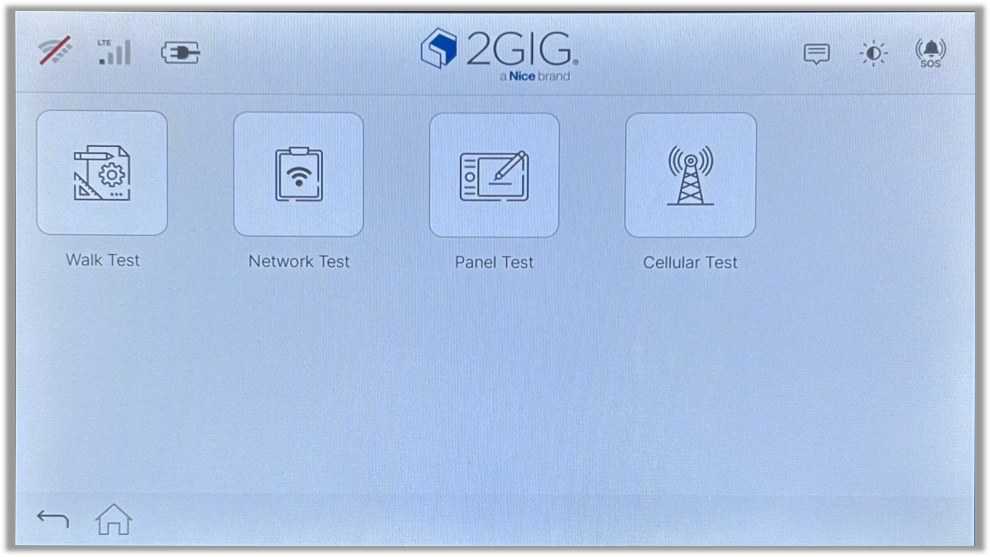
- Select the desired test to run.

Camera Live View
View the live feed of your cameras from the panel.
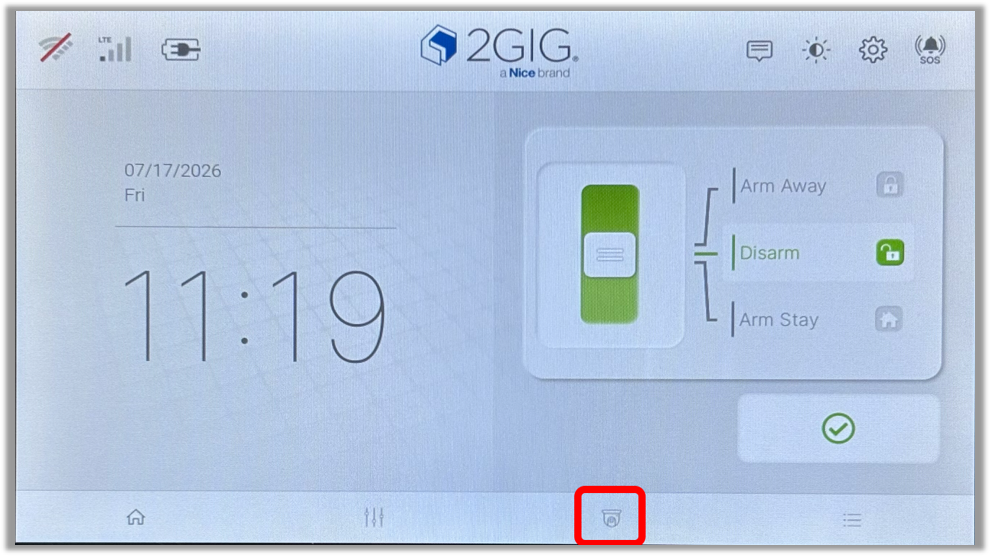
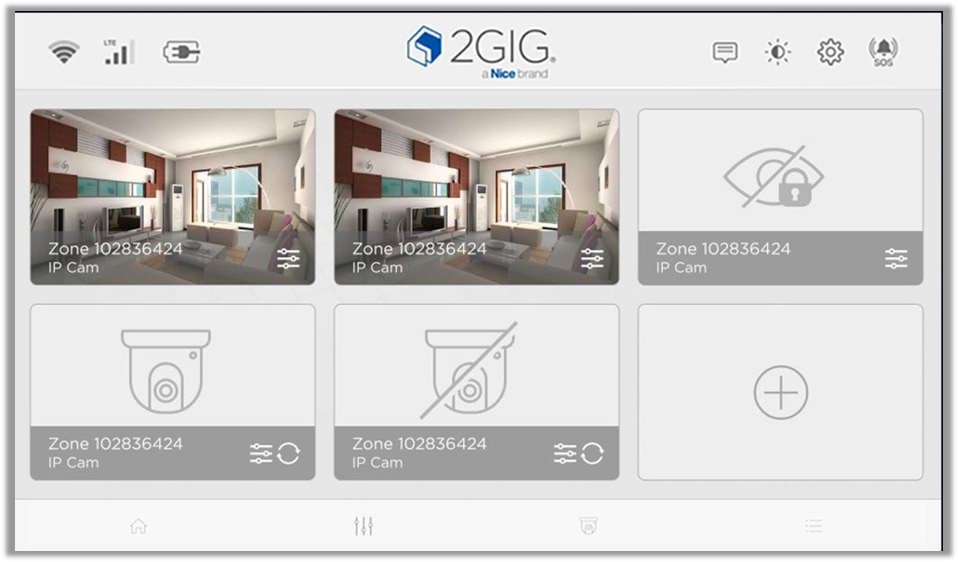
- Tap the camera icon on the bottom of the home screen.
- Tap the desired camera to view a full screen live feed.
User Codes
Add a User Code
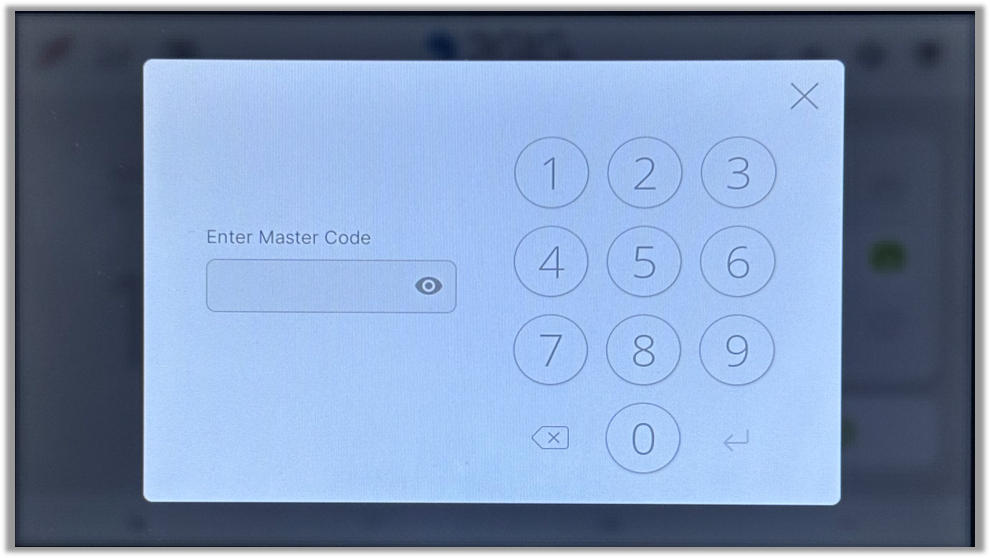
Process of adding a user code. Enter the master code then tap the enter arrow.
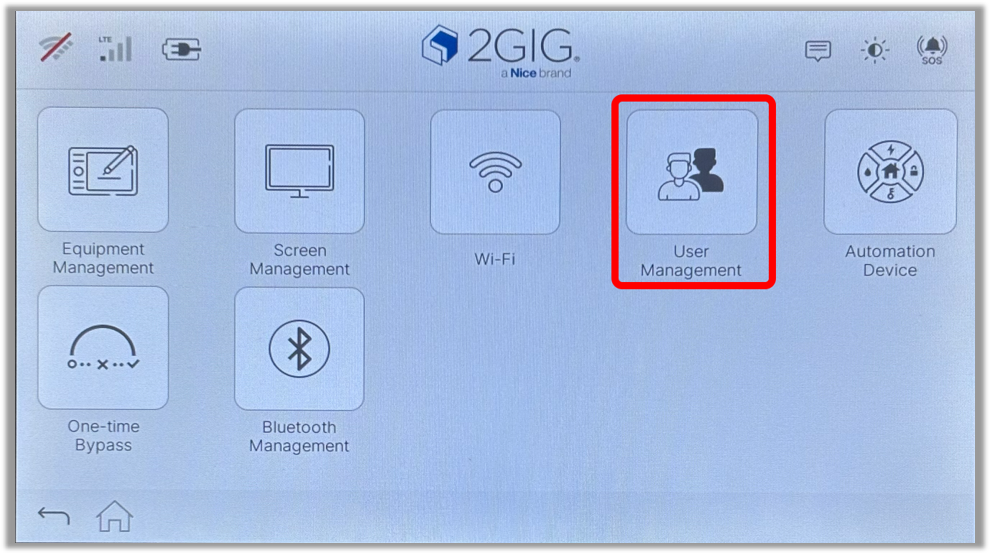
- Tap the gear icon in the top right corner.
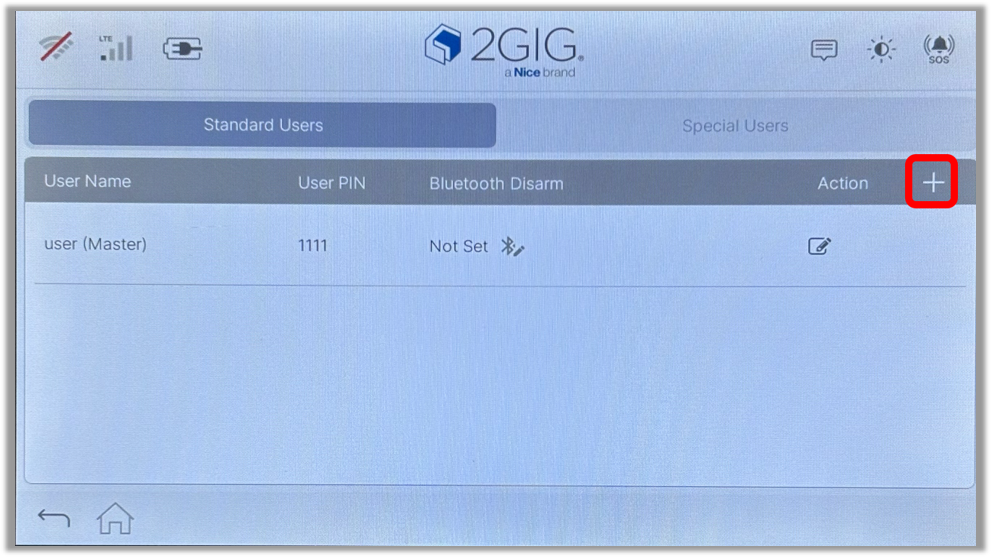
- Tap User Management.
- Tap the + icon.
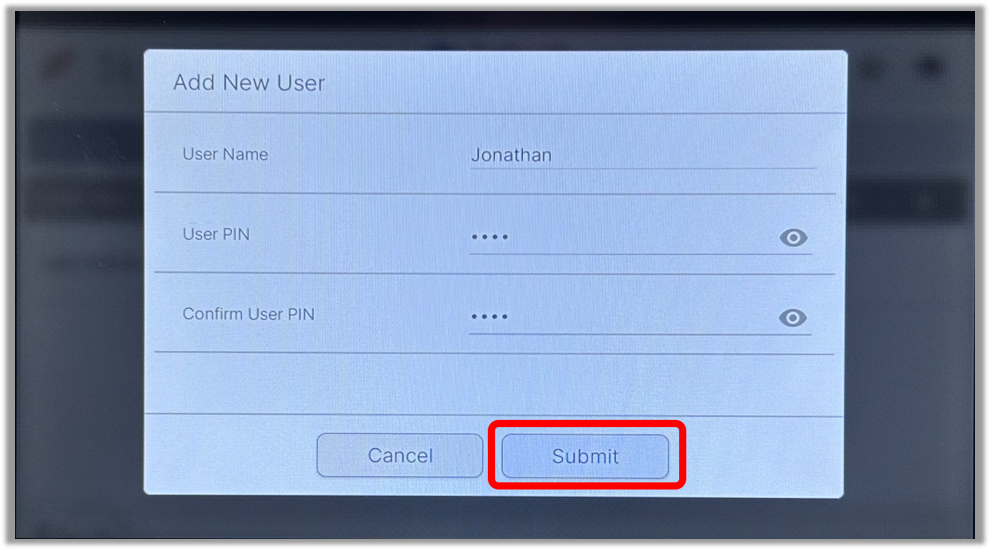
- Enter the user name, then enter and confirm the user code. Once complete, tap Submit.
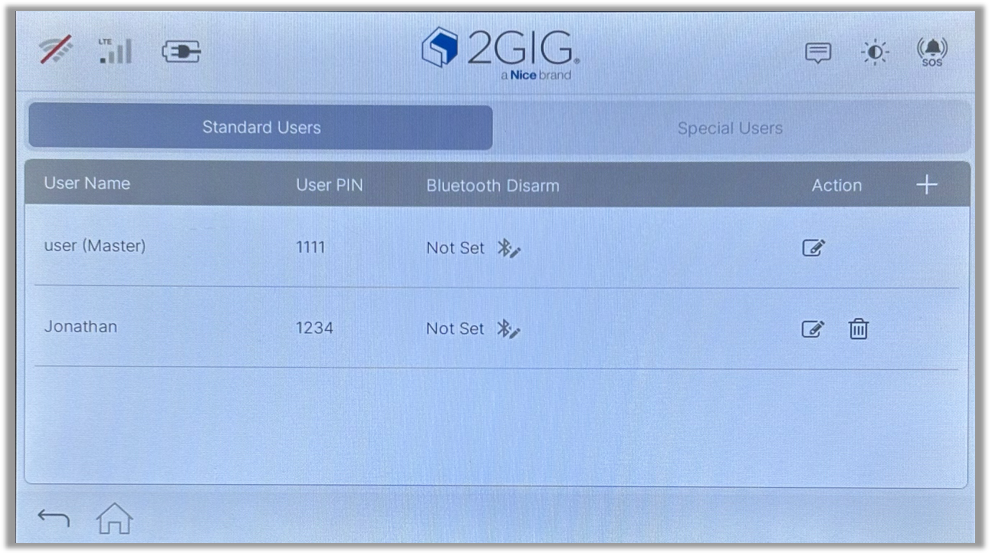
- The user code will then be displayed in the list of user codes.
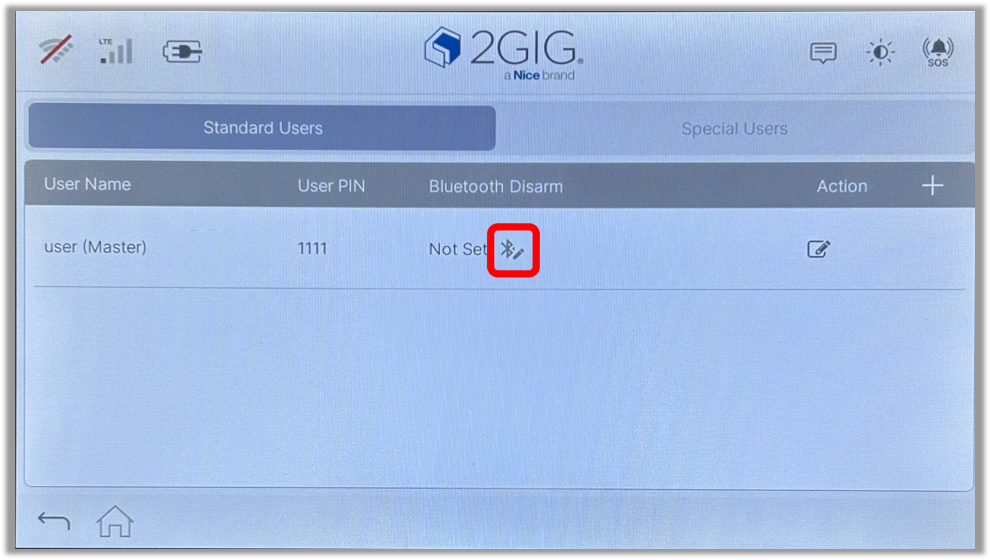
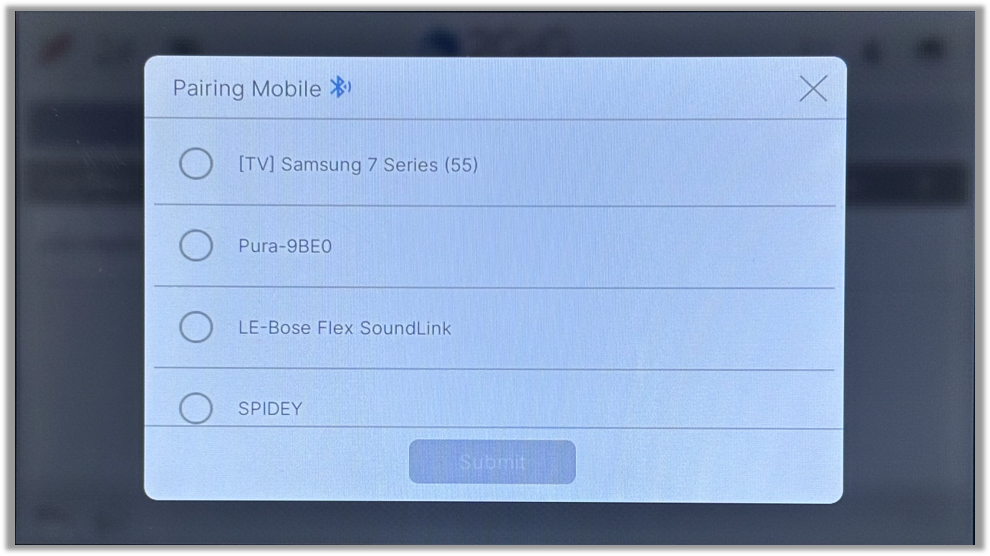
- User codes can be paired with a bluetooth device to utilize the bluetooth disarming feature. To set this up, tap the bluetooth icon next to a user code.
- Select the device to pair, then tap Submit.


Edit a User Code
Process of editing a user code.
- Tap the gear icon in the top right corner. Enter the master code then tap the enter arrow.
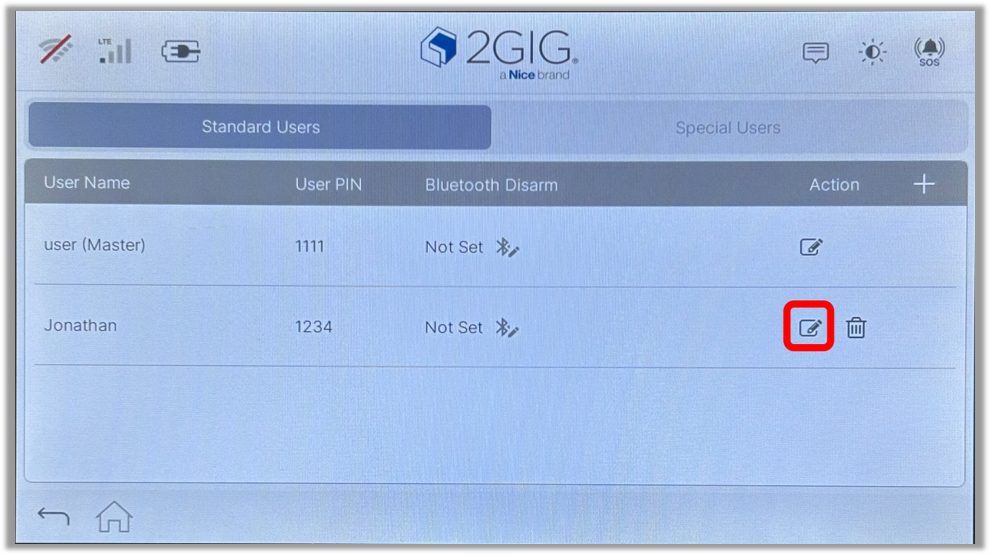
- Tap User Management.
- Tap the edit icon, then make all needed adjustments.
Delete a User Code
Process of deleting a user code.
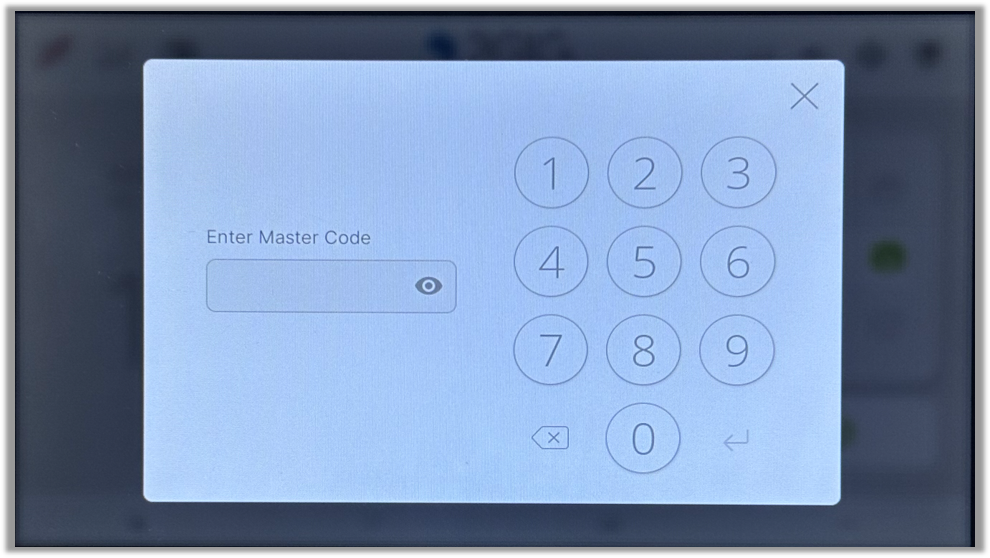
- Tap the gear icon in the top right corner. Enter the master code then tap the enter arrow.
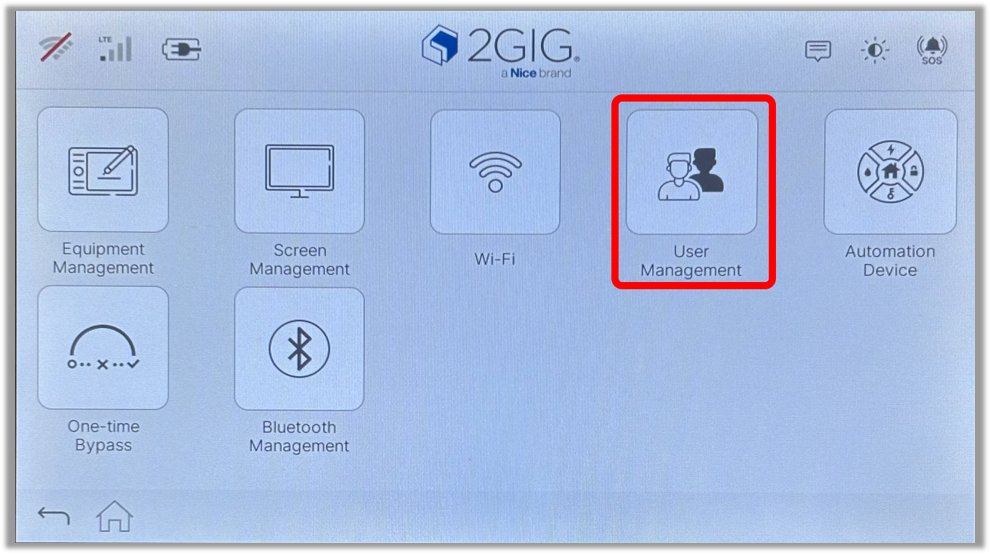
- Tap User Management.
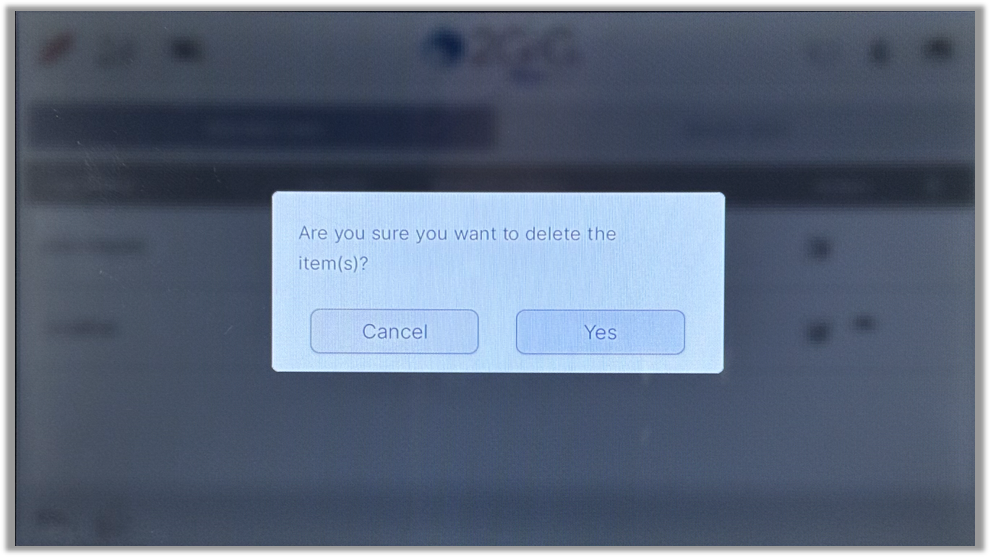
- Tap the trashcan icon, then tap Yes.


Programming
Panel Settings
Adjust various panel settings.
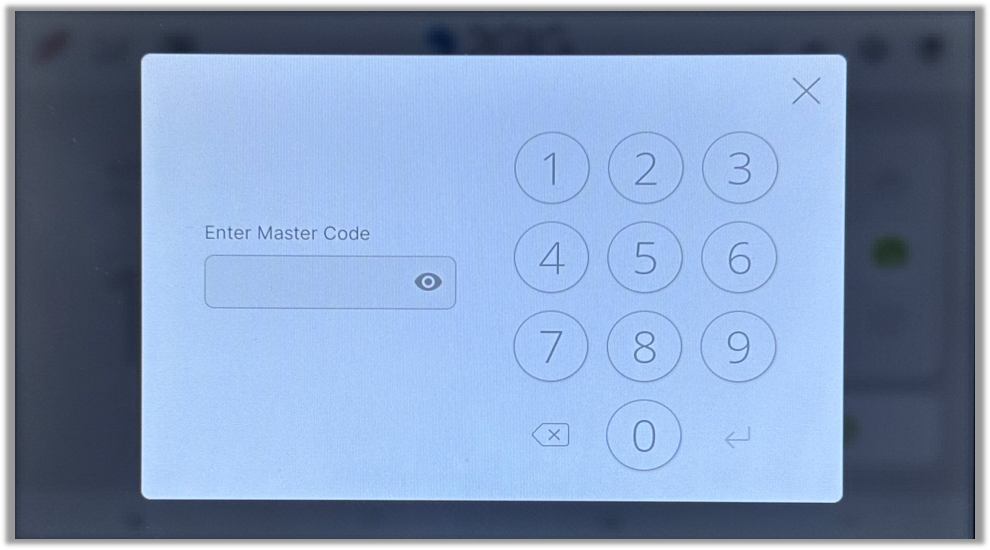
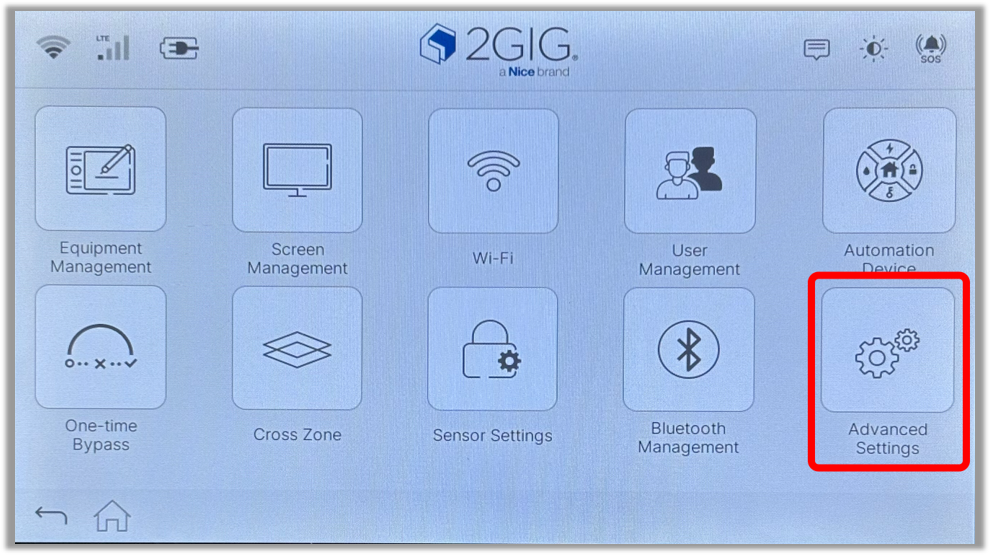
- Tap the gear icon in the top right corner. Enter the installer code then tap the enter arrow.
- Tap Advanced Settings.
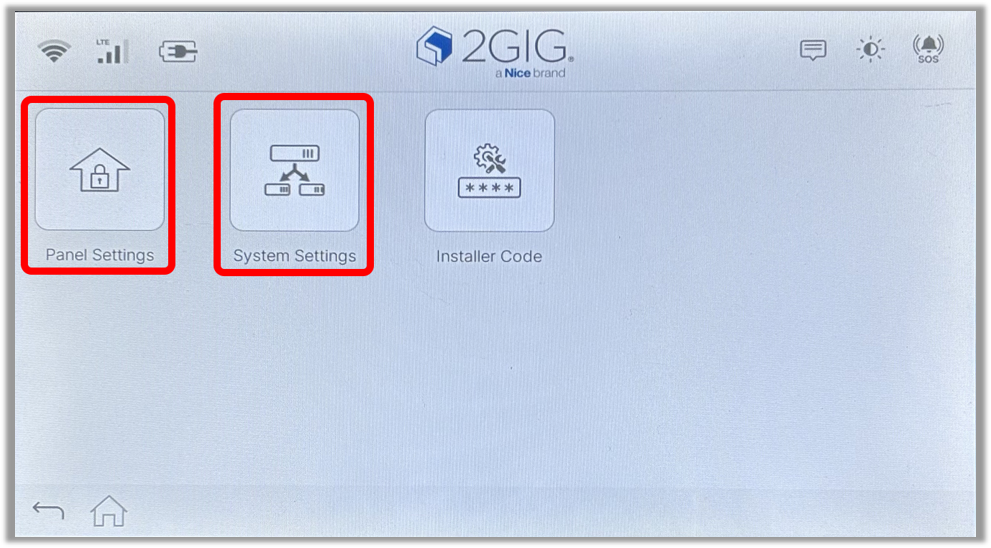
- Select either Panel Settings or System Settings, then adjust the desired settings.

Wi-Fi Programming
Configure the panel to a Wi-Fi network.
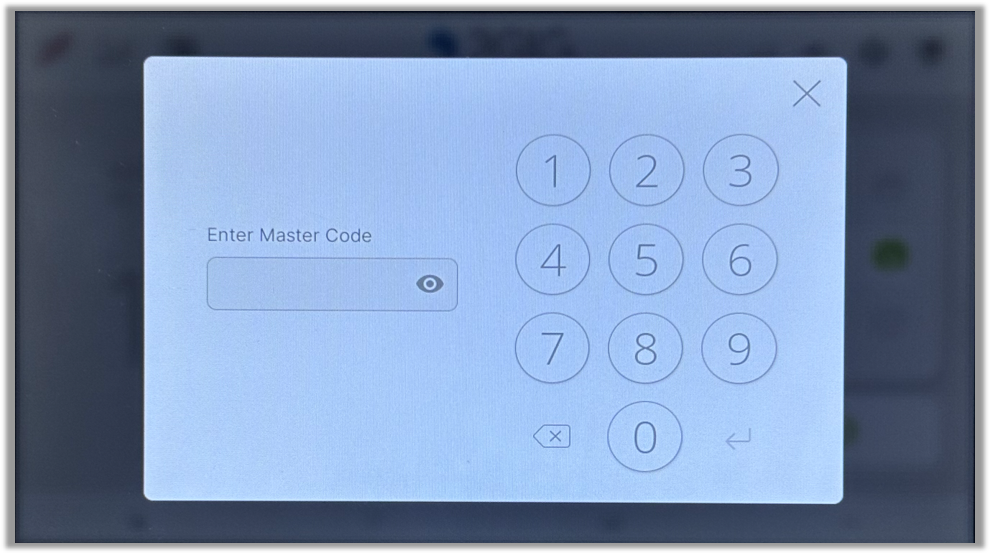
- Tap the gear icon in the top right corner. Enter the master code then tap the enter arrow.
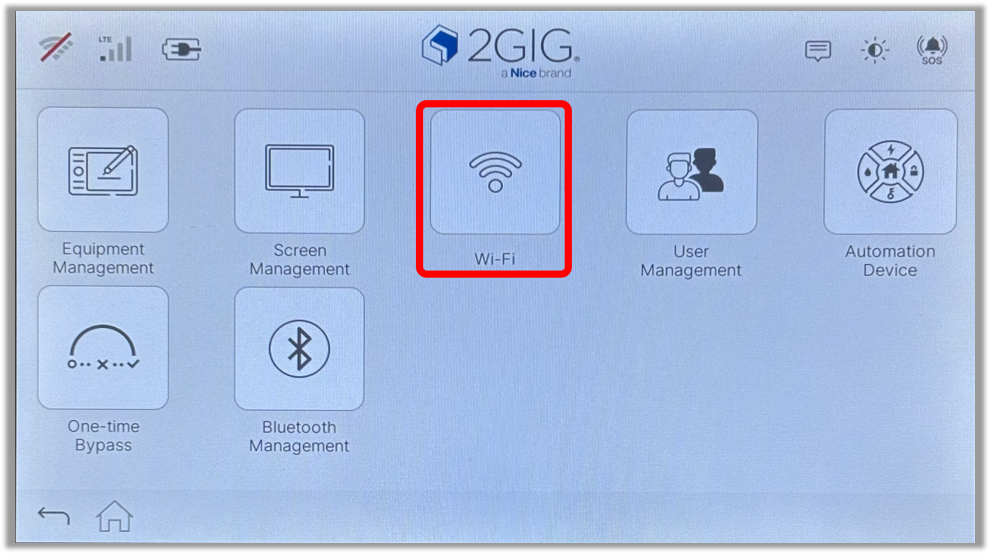
- Tap Wi-Fi.
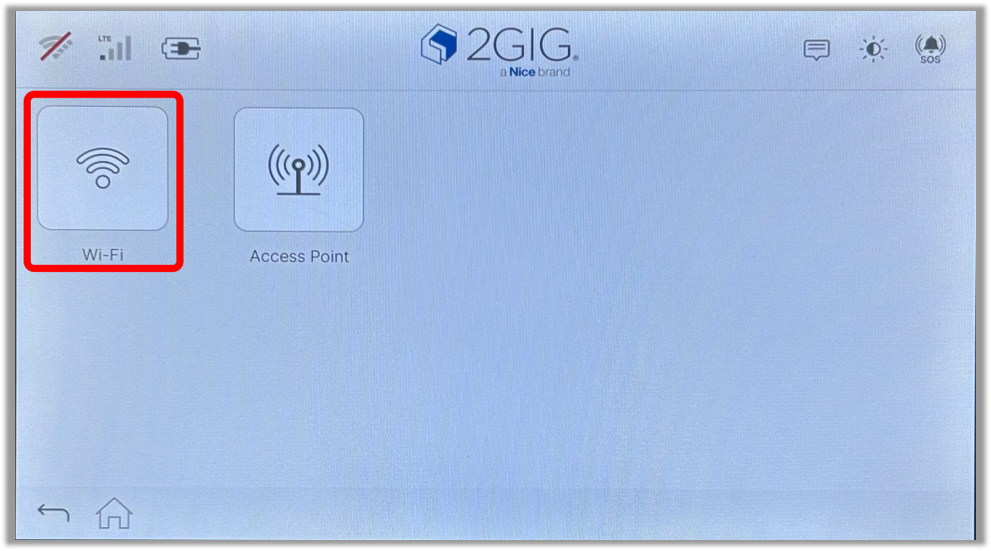
- Tap Wi-Fi.
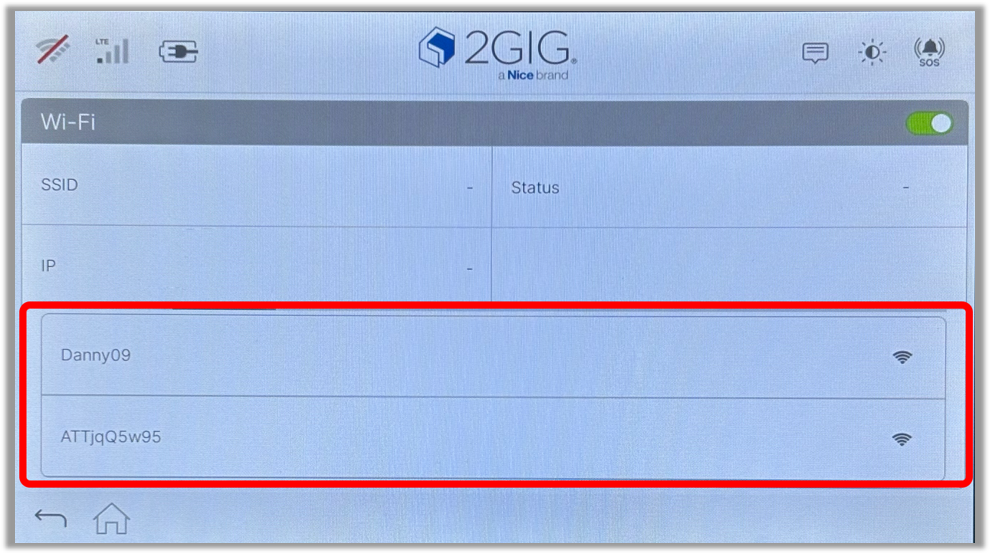
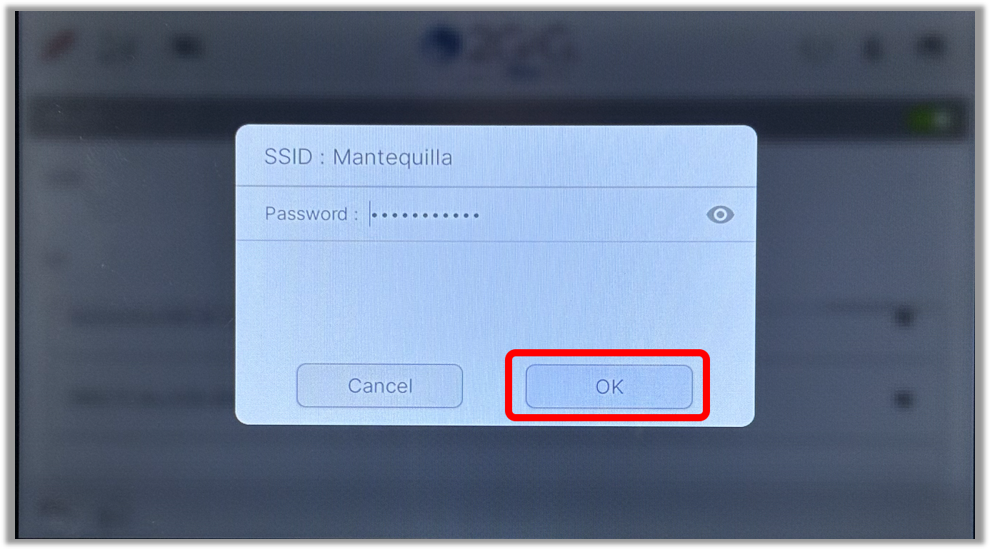
- Scroll through the available networks, and select the network you wish to connect to.
- Enter the network password, then tap OK.
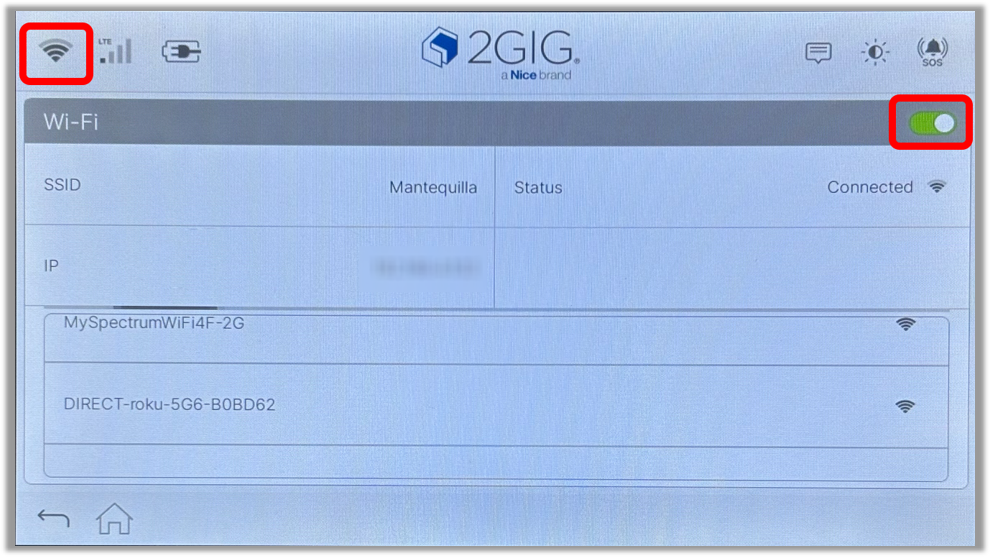
- Wi-Fi connection is displayed in the top left corner of the screen. Wi-Fi can be toggled on and off from the Wi-Fi configuration screen.


Add a Sensor
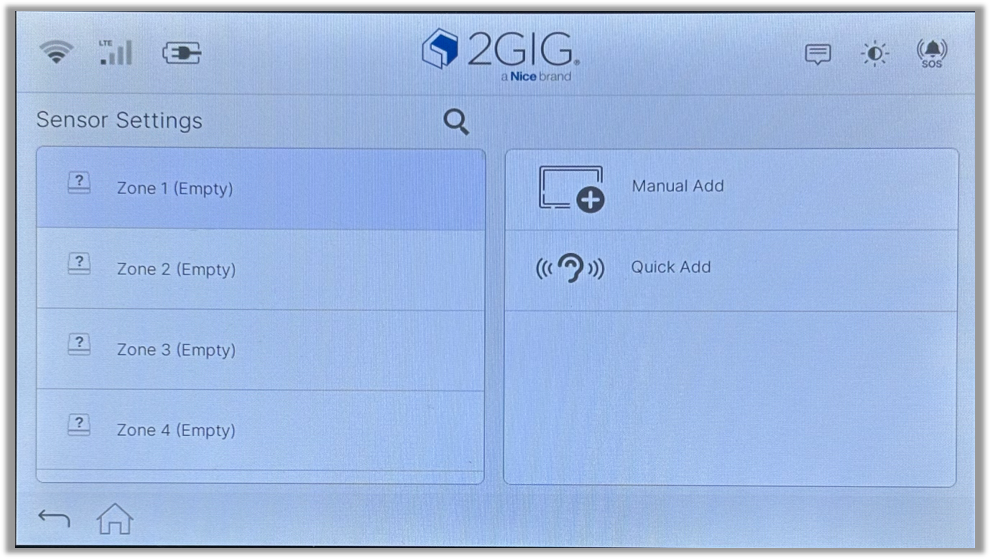
Process of adding a sensor.
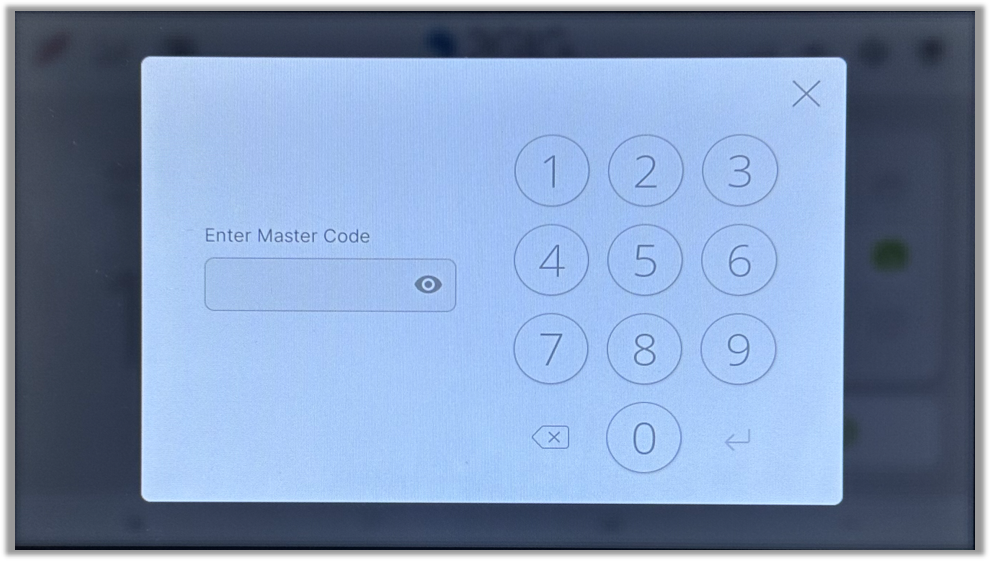
- Tap the gear icon in the top right corner. Enter the installer code then tap the enter arrow.
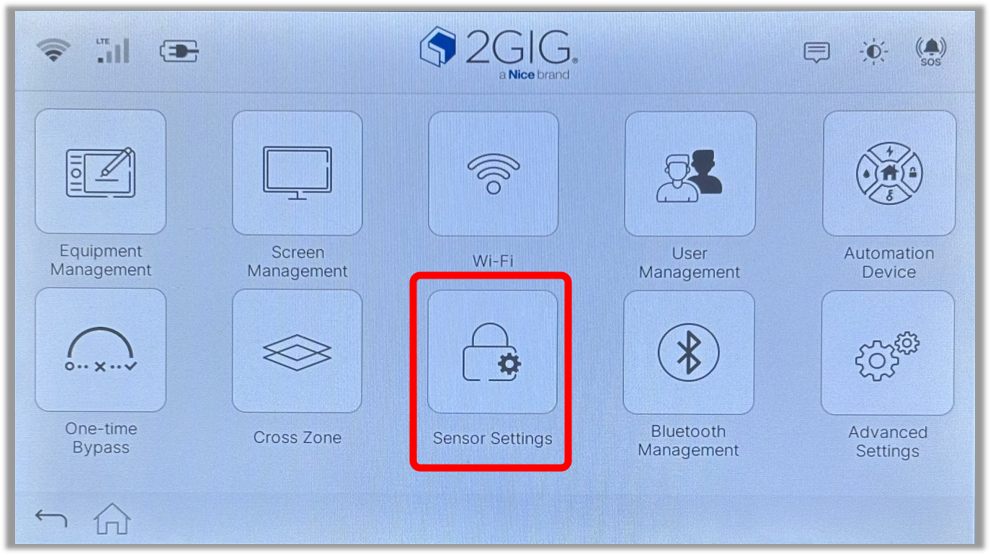
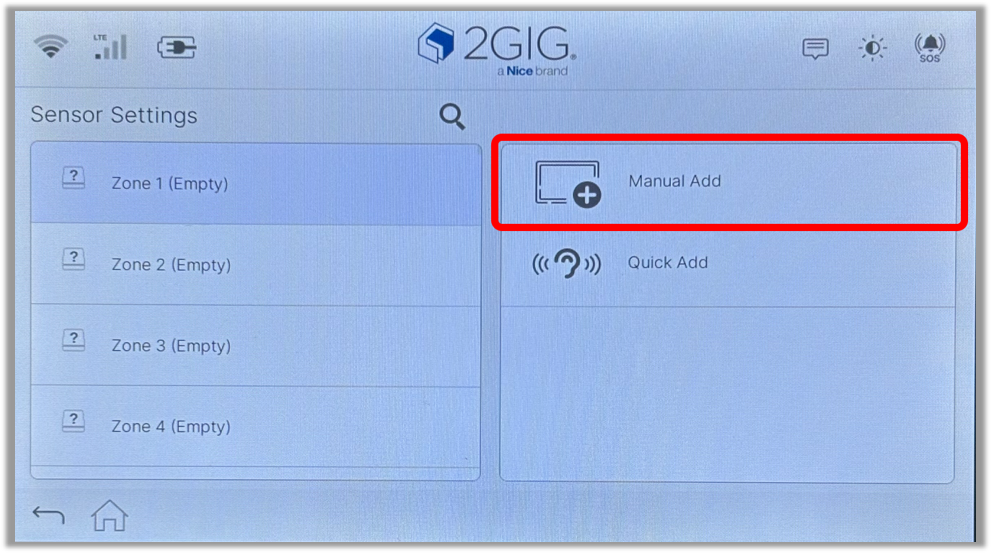
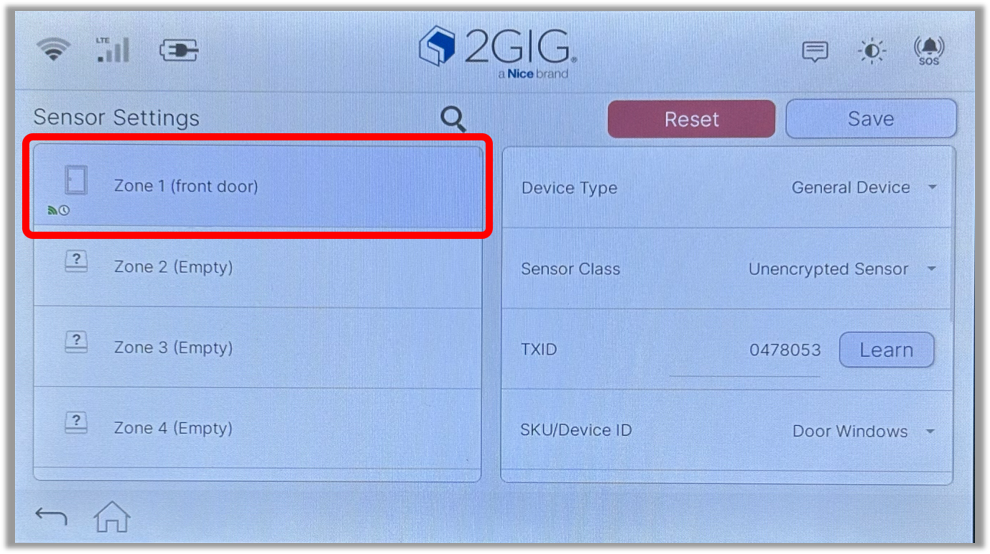
- Tap Sensor Settings.
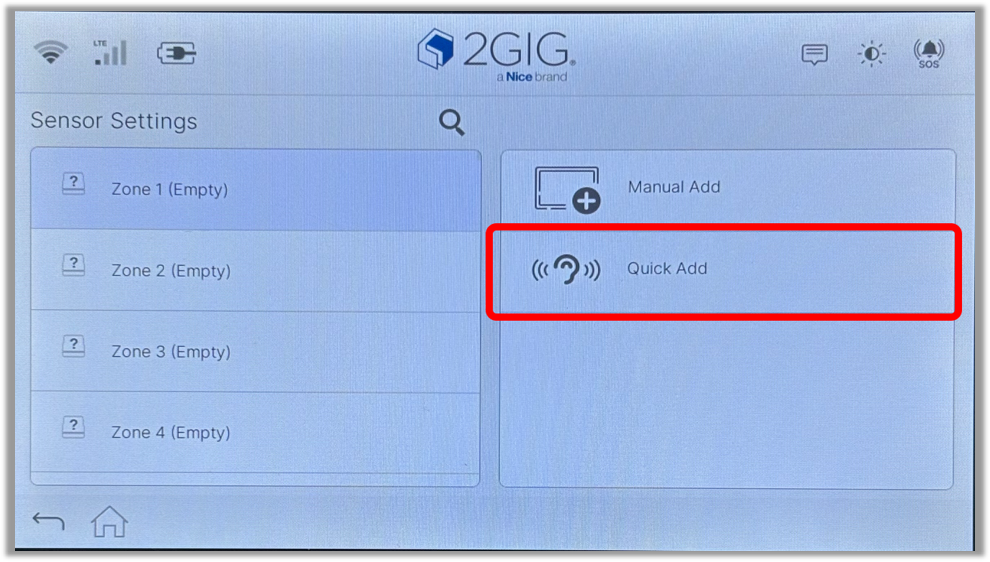
- You can either perform a Manual Add or Quick Add. To perform a Manual Add, begin by tapping Manual Add.
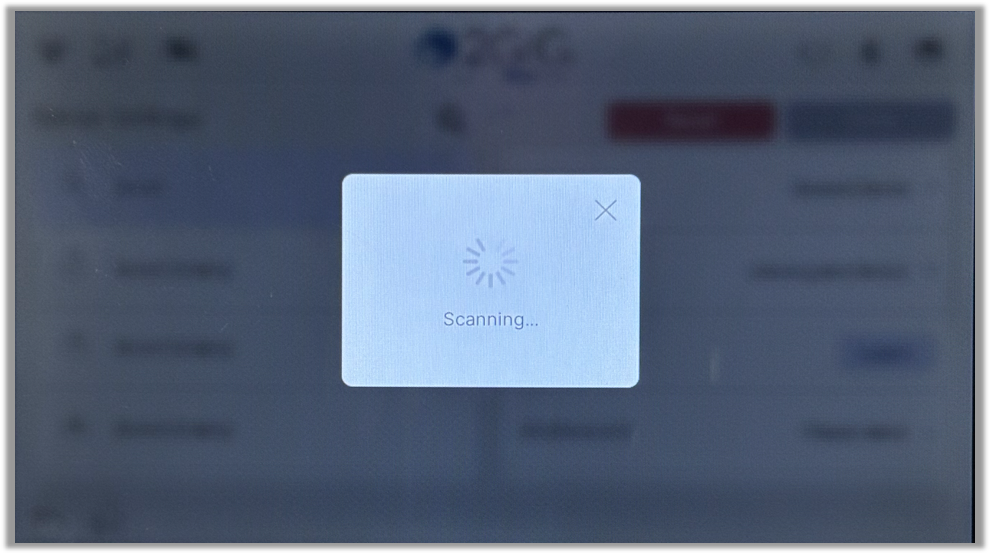
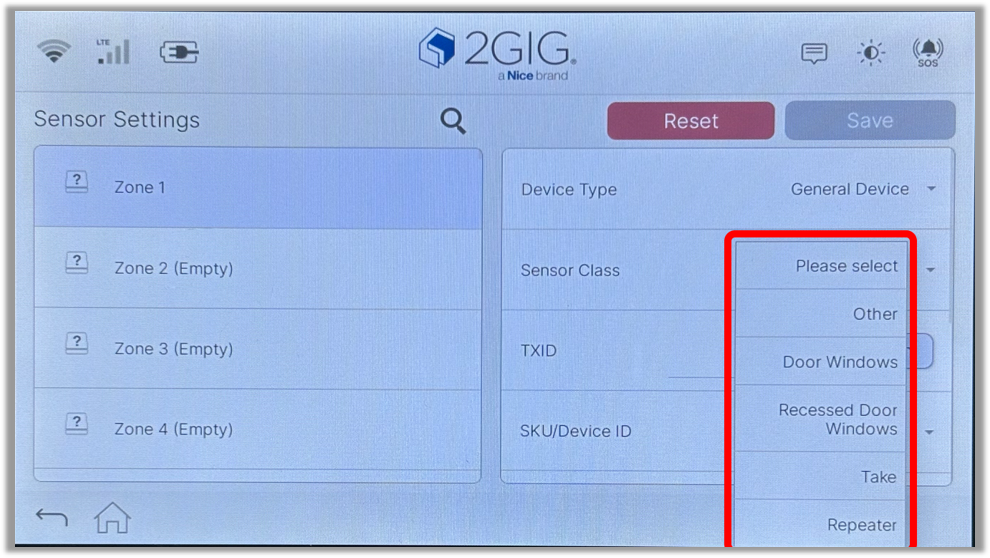
- In the TXID field, you can either type the TXID of the sensor, or tap Learn then activate the sensor to automatically enter the TXID.
- Next, select the SKU/Device ID. You will select the type of sensor you are programming.
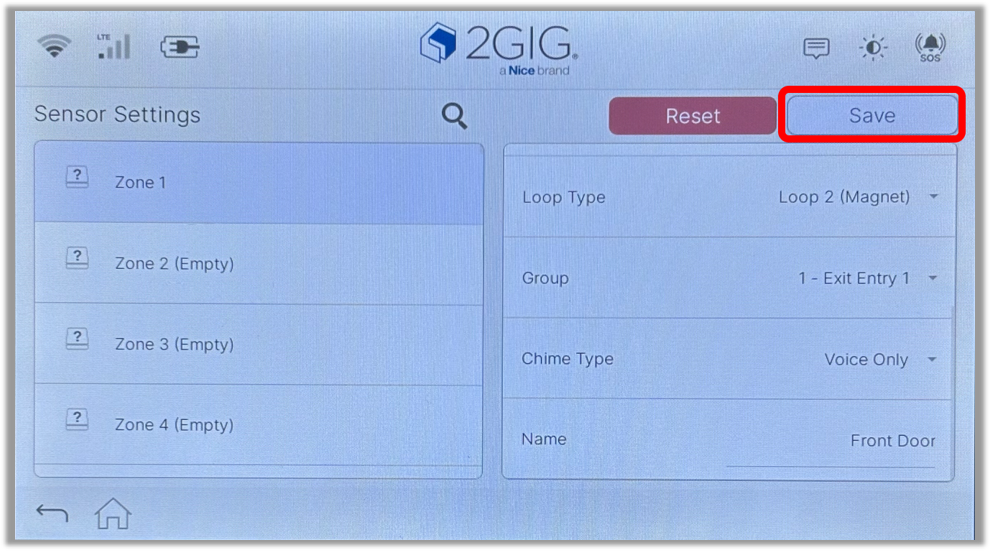
- Select the type of chime you want for the sensor, and enter the sensor name. Once all information has been entered, tap Save.
- The sensor will now show in the list of sensors on the left.
- To perform a Quick Add, begin by tapping Quick Add.
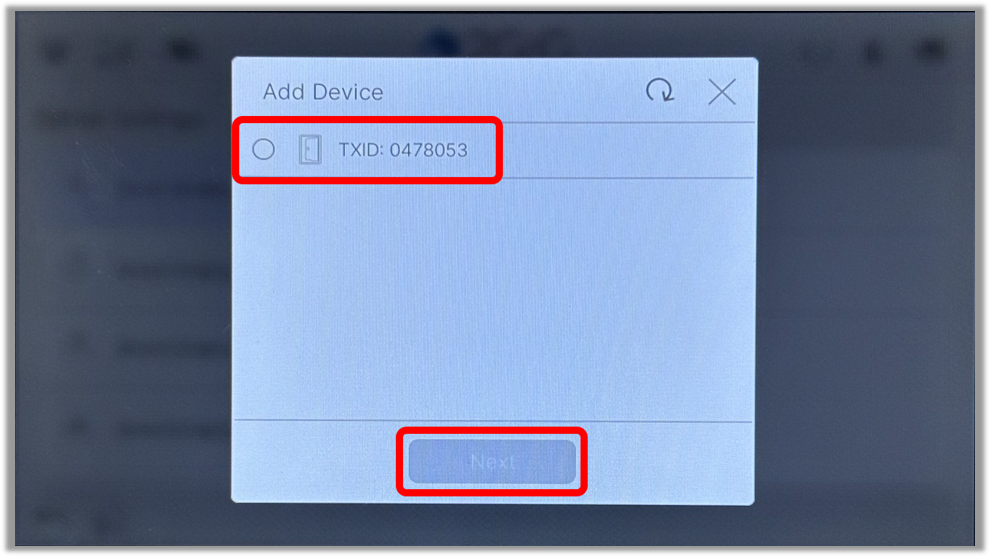
- Activate the device to learn it into the panel. Once the panel detects the sensor, select it from the list and tap Next.
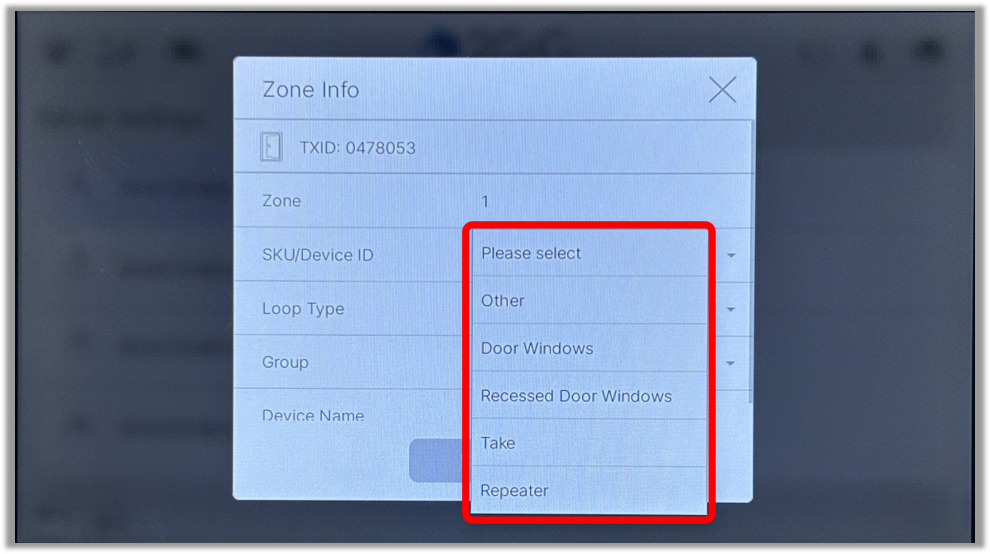
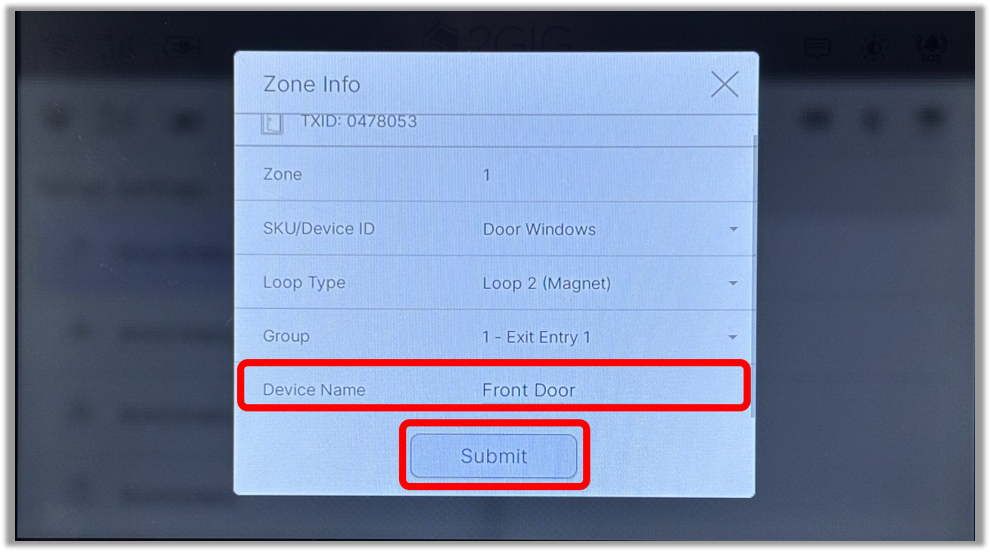
- Select the SKU/Device ID. You will select the type of sensor you are programming.
- Enter the Device Name then tap Submit.
- The sensor will then be displayed in the sensor list on the left.






Delete a Sensor
Process of deleting a sensor.
- Tap the gear icon in the top right corner. Enter the installer code then tap the enter arrow.
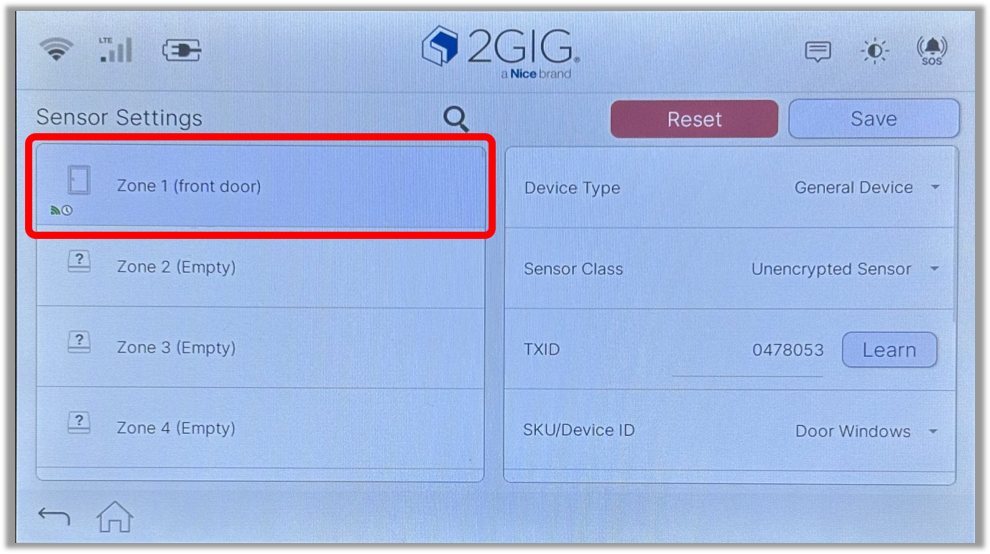
- Tap Sensor Settings.
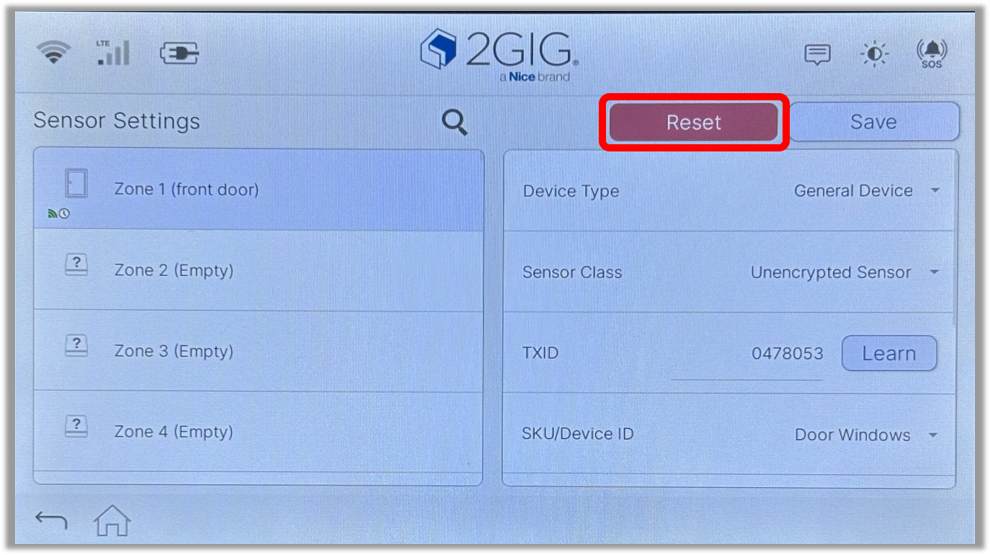
- Tap the sensor you wish to delete, then tap Reset.
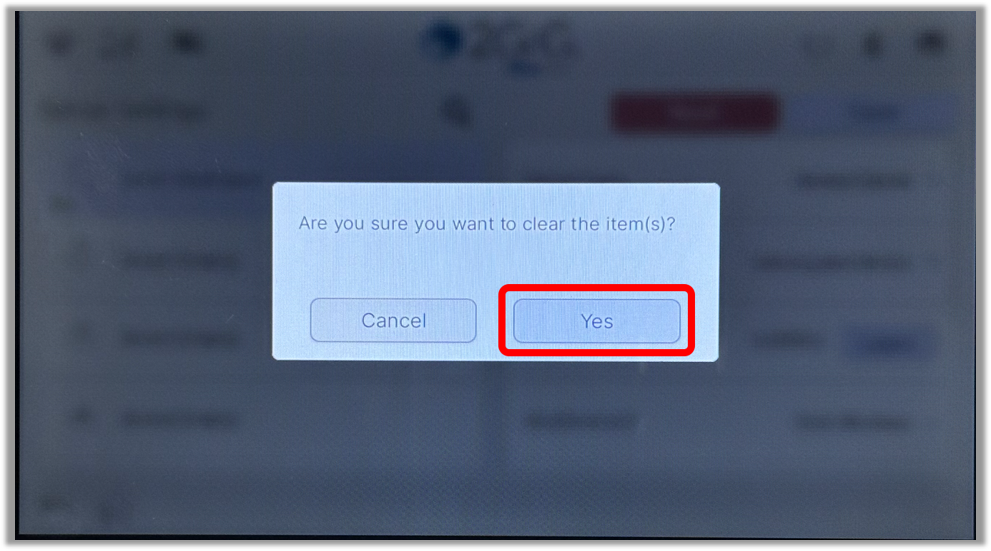
- Tap Yes.
- The sensor will now be deleted from the panel.
Z-Wave
Add/Delete a Z-Wave Device
Process of adding or removing a Z-Wave device.
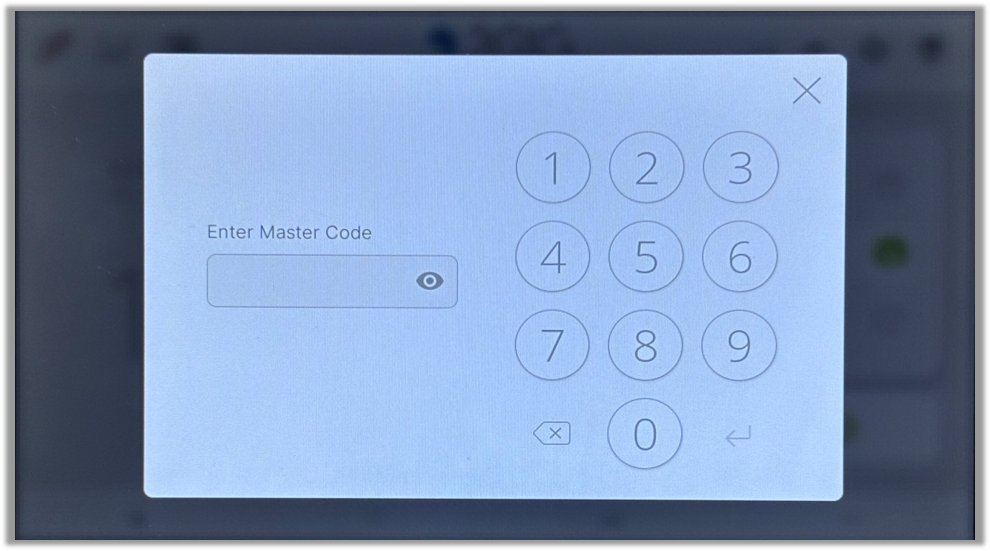
- Tap the gear icon in the top right corner. Enter the master code then tap the enter arrow.
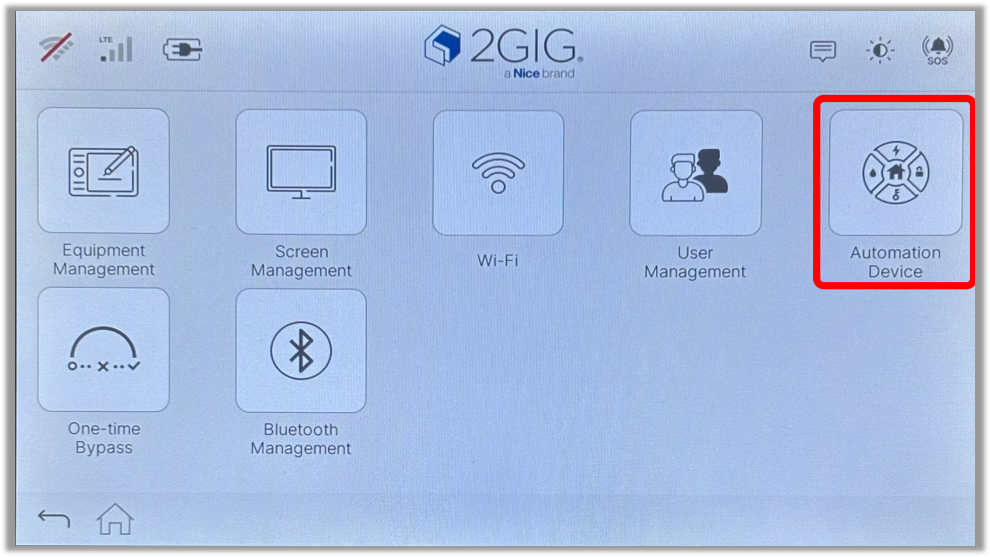
- Tap Automation Device.
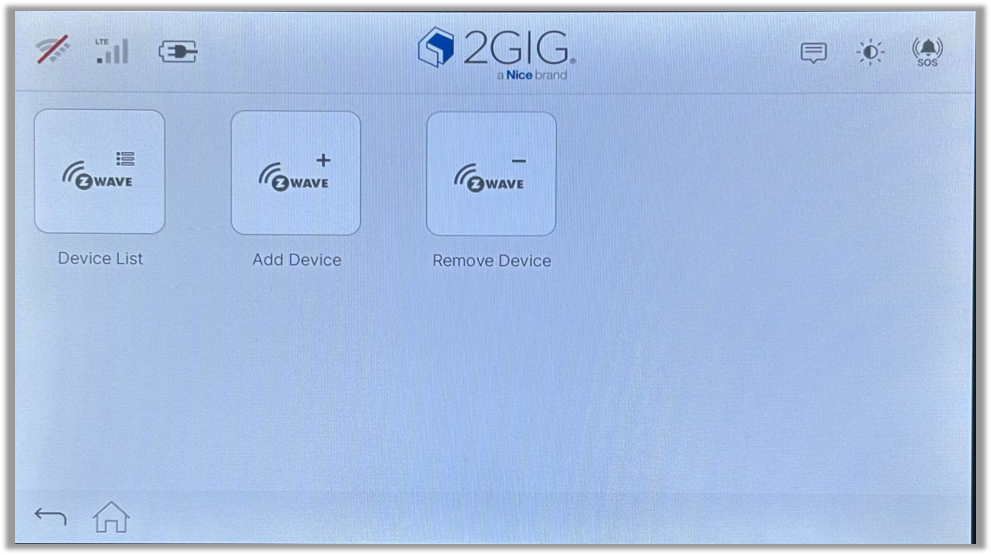
- Tap Add Device or Remove Device, then activate the Z-Wave device.

Control Z-Wave Devices
How to control Z-Wave devices added into the panel.
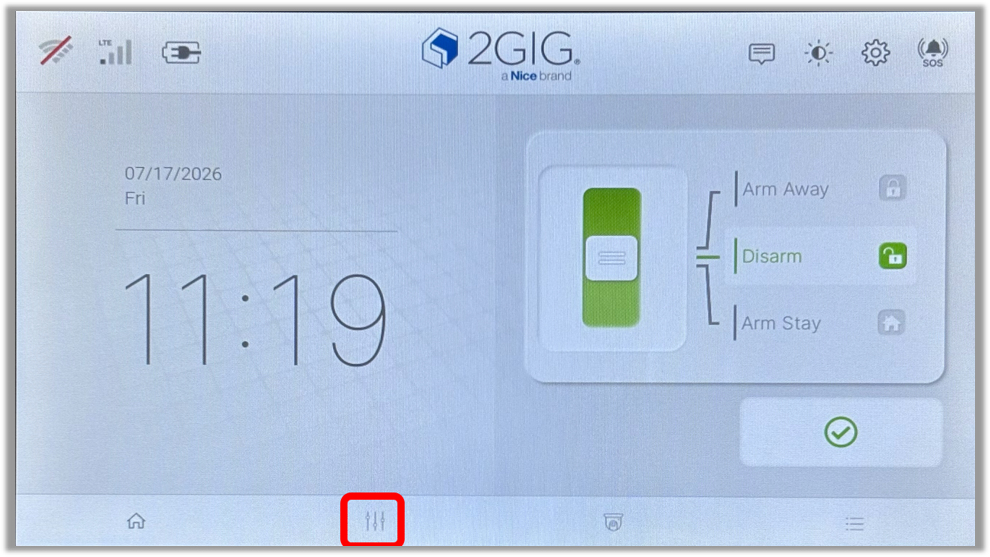
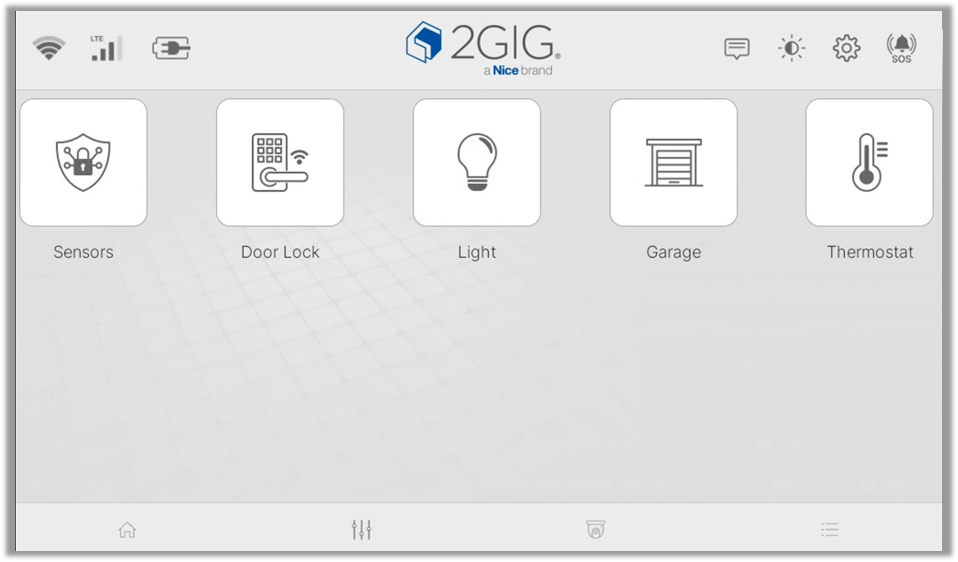
- Tap the devices icon on the bottom of the panel.
- Select the type of device to control, then operate the device as needed.
Troubleshooting
Power Cycle
If any error or issues are encountered, perform a power cycle as the first troubleshooting step.
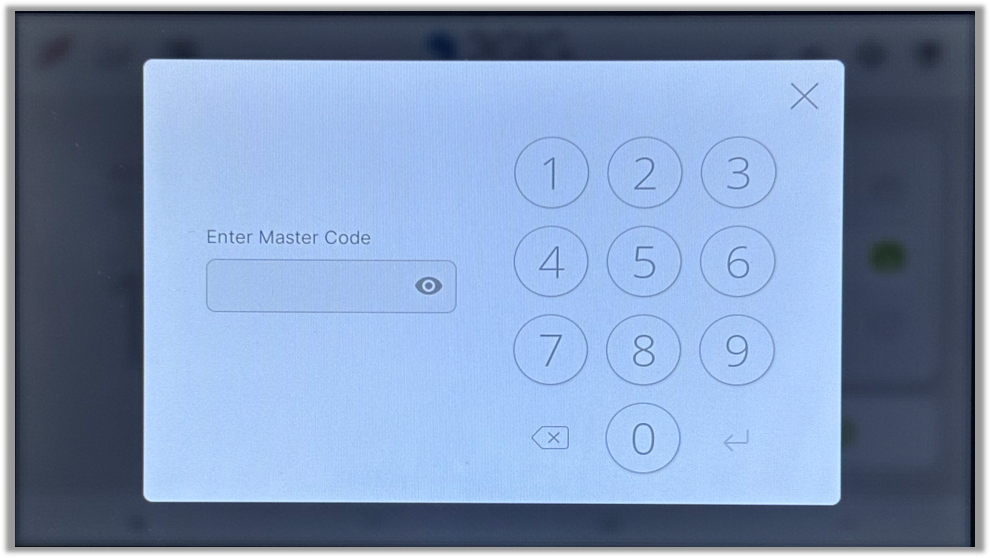
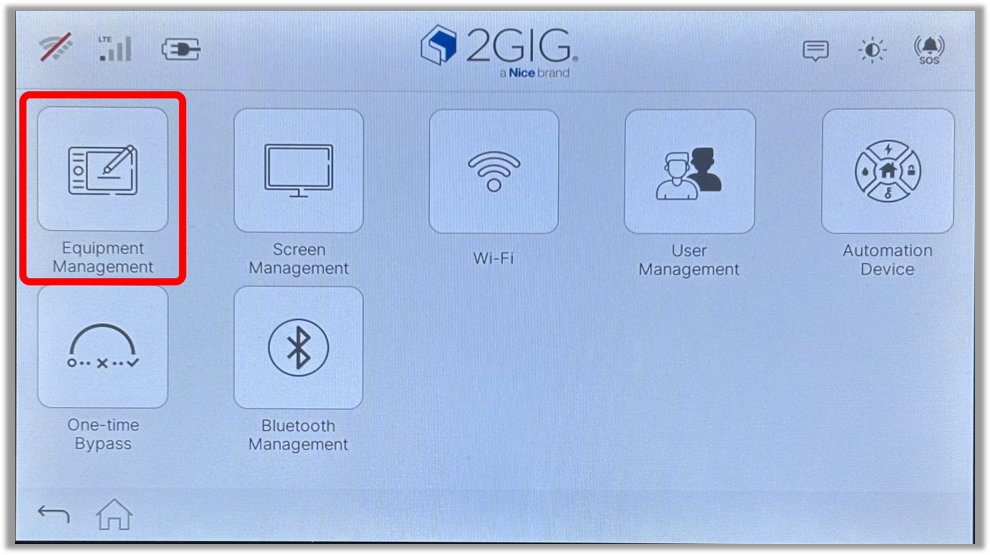
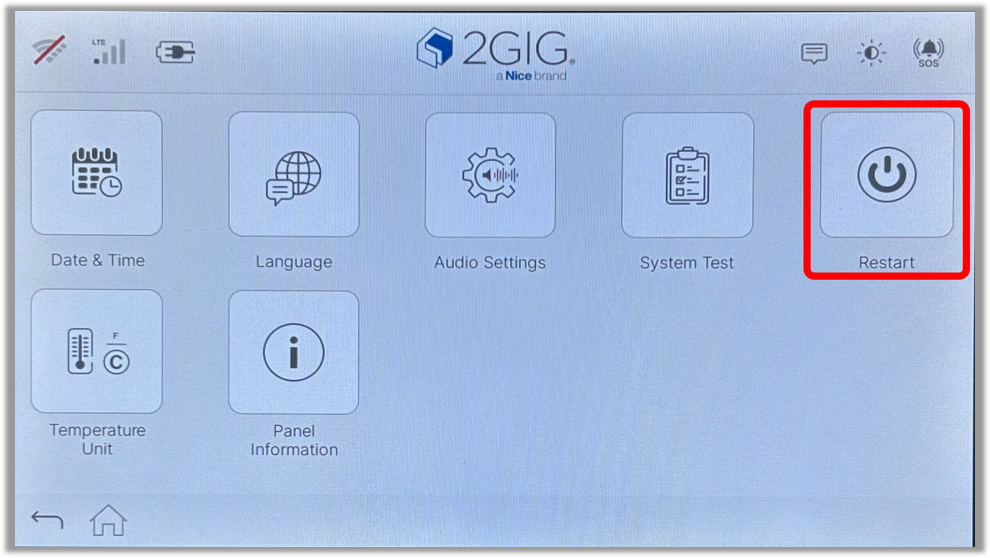
- Tap the gear icon in the top right corner. Enter the master code then tap the enter arrow.
- Tap Equipment Management.
- Tap Restart. After a few minutes the panel will boot back up.

Replace Backup Battery
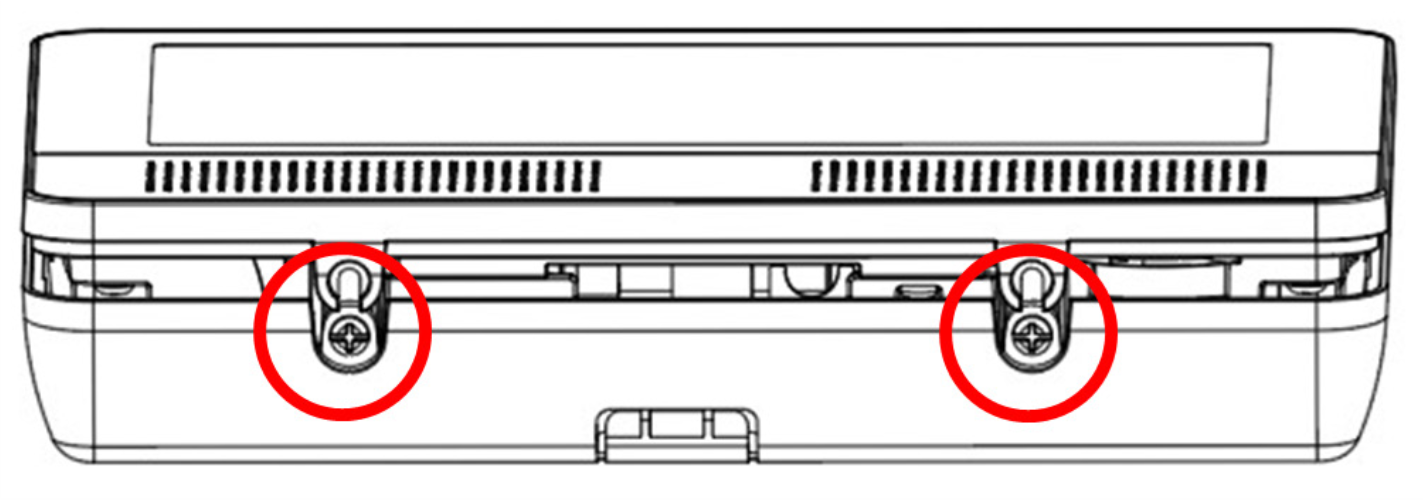
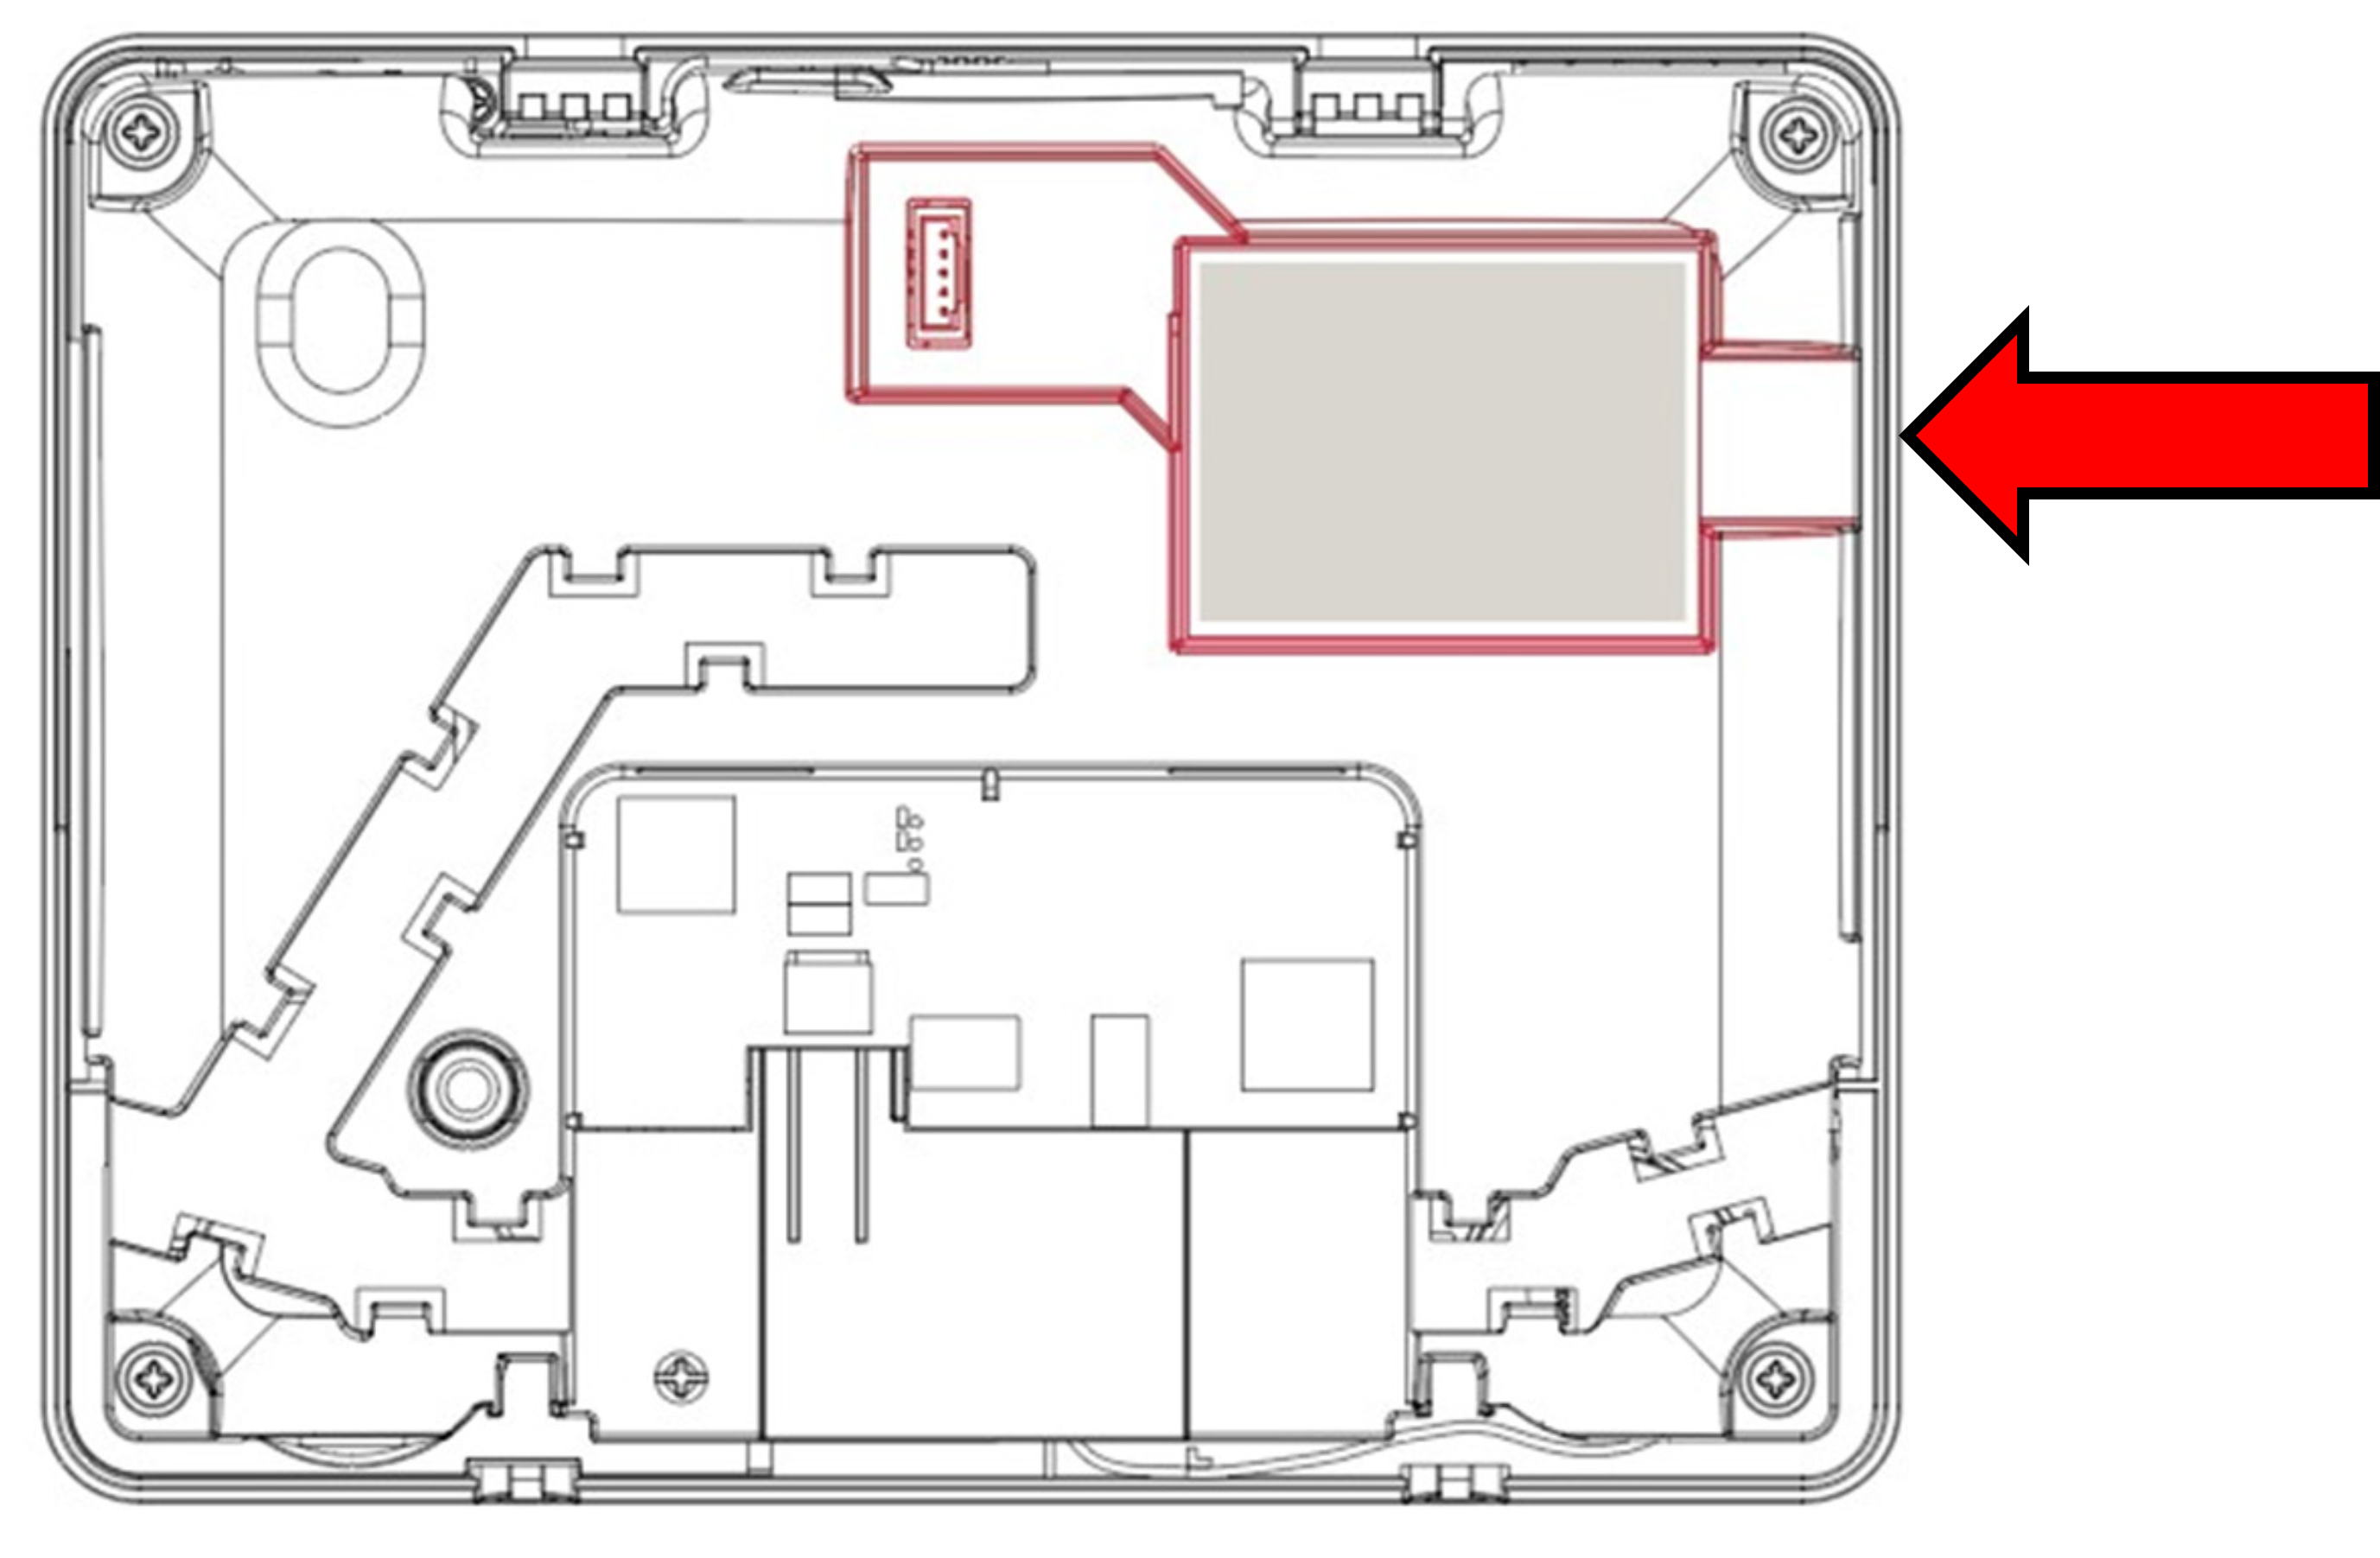
If the panel is indicating a low backup battery that has not recharged after approx. 24 hours, follow this process to open the panel and access the backup battery.
- Remove the 2 screws from the bottom of the panel, then remove the panel from the back-plate.
- The battery is located in the top right corner of the back of the panel.
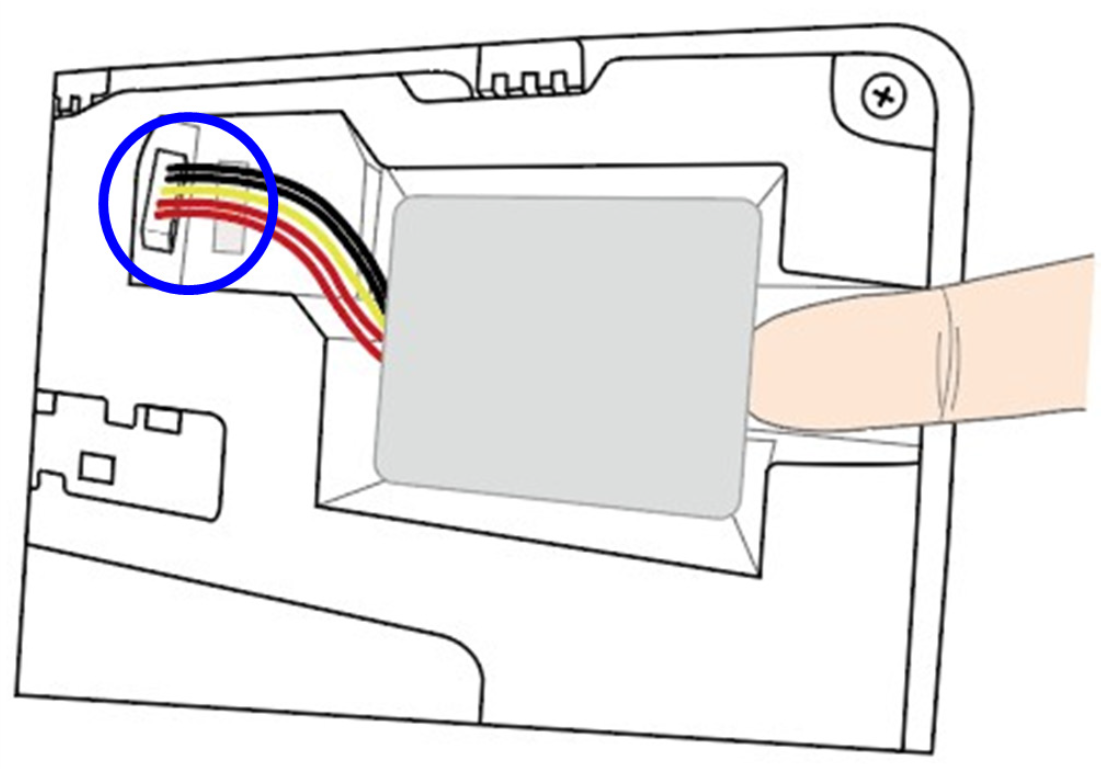
- To remove the battery, disconnect the cable connector from the panel, then lift the battery out of the compartment.
For additional information relating to your device, click the following link to view the original manufacturer's user manual: 2GIG GCTouch User Manual
If you need further assistance, text us at 469.513.8685 or chat with us 24/7 for an immediate response.